ReplaceText
This activity helps the user to replace an existing text with a new text in the specified input word document. It functions the same as the “Replace” functionality in the Microsoft “Word” document.
Properties
INPUT
DelayAfter: It assists the user to add a delay before initiating subsequent activities. The delay duration here is in milliseconds. By default, it is set to “1000” milliseconds. When the option is left blank, the delay will not be considered.
DelayBefore: It assists the user in adding a delay before starting the execution of the activities. The delay duration here is in milliseconds. By default, it is set to “1000” milliseconds. When the option is left blank, the delay will not be considered.
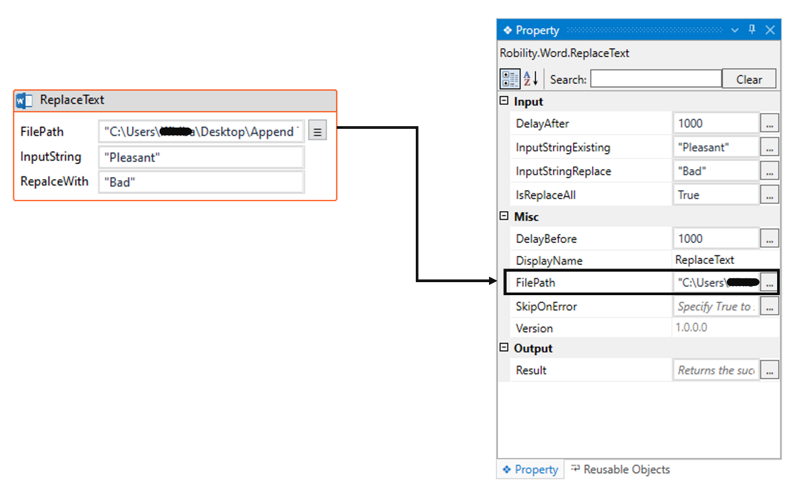
ExistingText:* This parameter specifies to provide the existing “input” text which needs to be found in the specified input word document. You can either hardcode the values in the “String” variable or pass the values as “String” datatype. This parameter accepts values in “String” datatype.
IsReplaceAll:* This parameter enables to replace all the found existing text with the new text in the specified word document. Specify the “Boolean” value as “True” or “False.”
True: Enables to replace all the text.
False: It replaces only the first found text.
ReplaceText:* This parameter specifies to provide the new “input” text which needs to be replaced in the specified input word document. You can either hardcode the values in the “String” variable or pass the values as “String” datatype. This parameter accepts values in “String” datatype.
MISC
DisplayName: Displays the name of the activity. The activity name can be customized, which aids in troubleshooting.
SkipOnError: Specify the “Boolean” value as “True” or “False.”
True: Continue executing the workflow regardless of any errors thrown.
False: Halt the workflow if it encounters any errors.
None: If the option is left blank, the activity will, by default, behave as if “False” were chosen.
Version: It indicates the version of the feature being used.
OUTPUT
Result: It provides the ability to view the execution status of the activity. It returns values in “Boolean.”
True: Indicates that the activity has been executed successfully without any errors.
False: Indicates that the activity has been unsuccessful due to an unexpected error being thrown.
* Represents mandatory fields to execute the workflow
Example
Here’s an example of how the “ReplaceText” activity works in the workflow –
The following is a simple example that demonstrates how to replace the existing text with a new text in the specified word document.
1. Create a solution for building a workflow.
2. Drag and drop the “ReplaceText” activity onto the designer pane and set it as the “Start Node.