Managing fields
How to delete/ update the fields?
The fields can be updated or modified after saving the project configuration. Follow the below steps to configure update the fields,
1. Navigate to the SmartInteract option.
2. Click on the fields from the right-hand side display menu.
3. Now, update/ modify the fields as per the requirement.
4. Click on “Update” button to add the changes.
5. Then click on “Save” button to save the modified fields.
To delete the fields, click on the field name form the right-hand side display menu and choose “Delete” button. The changes will be reflected when the project configuration is saved.
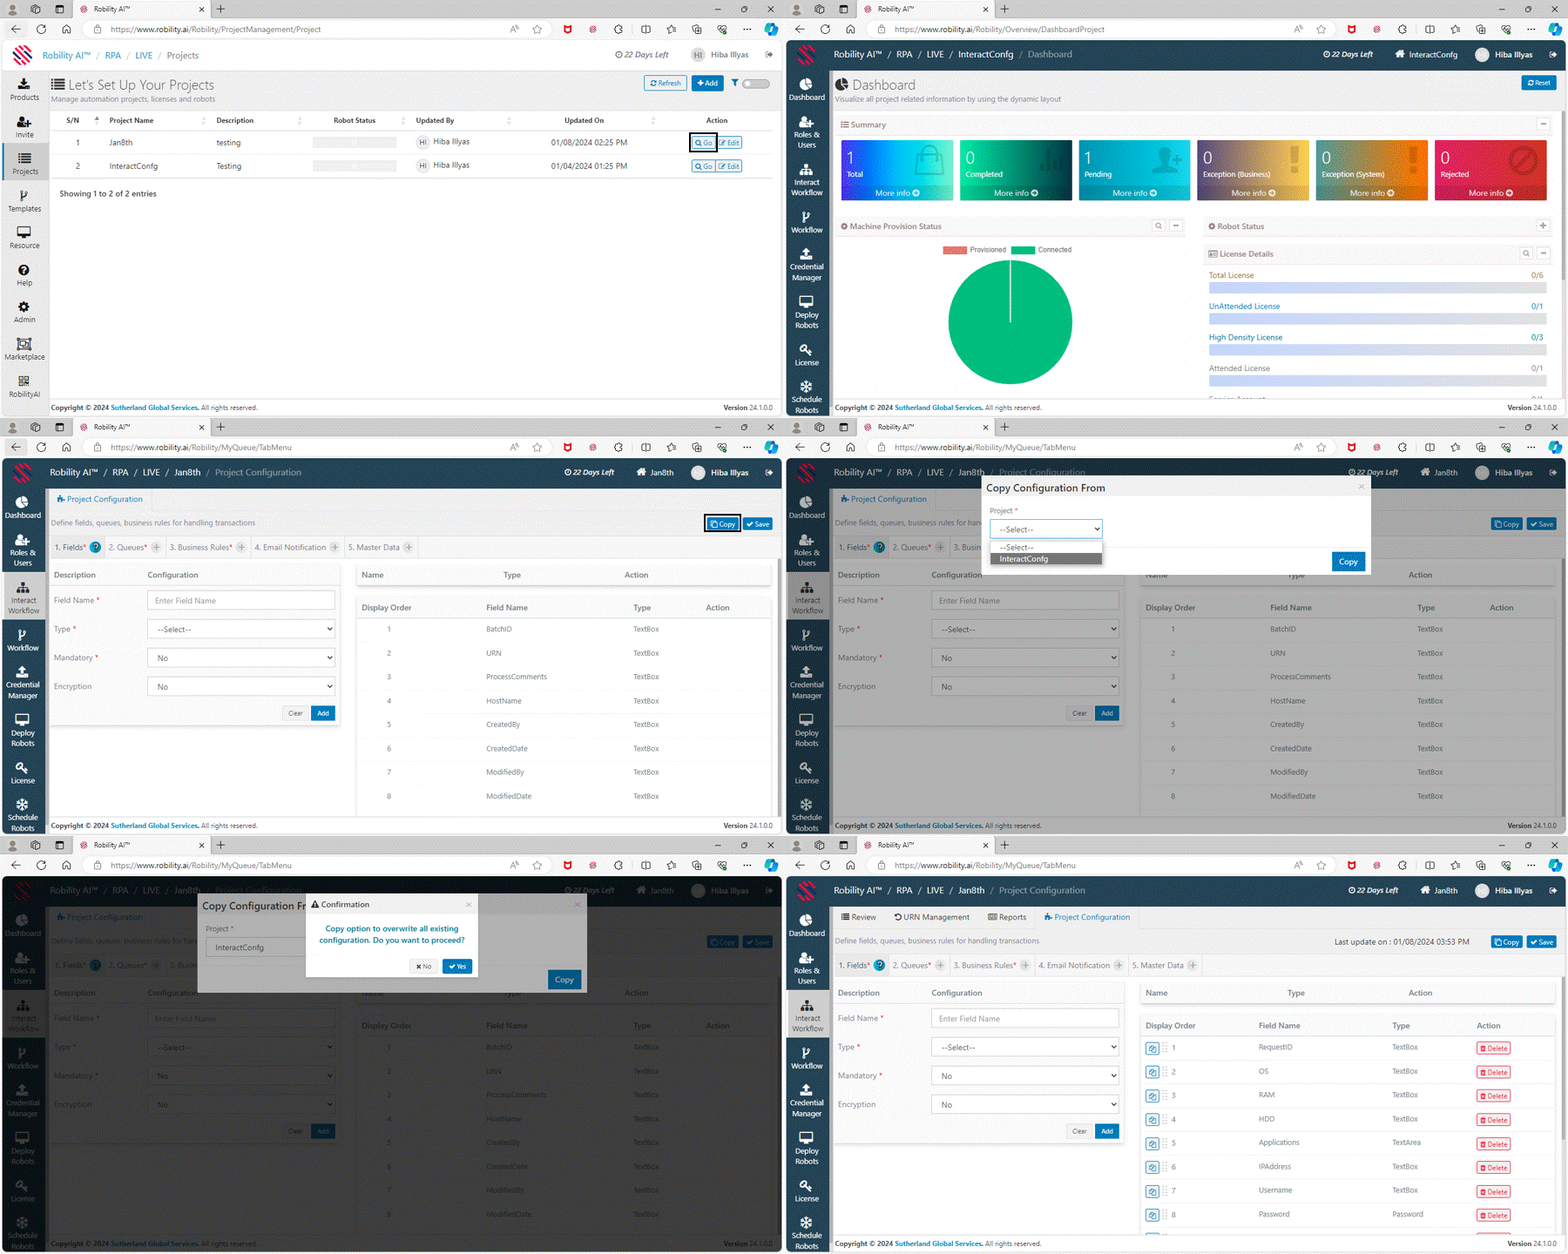
How to copy interact configuration from another project?
You can copy and add the configuration from another project in “Interact” by replicating similar fields and queues in the new project. This streamlined approach ensures that you can easily replicate configurations from one project to another, promoting consistency and efficiency in your “Interact” setup.
To copy the Interact configuration from another project, follow the below steps,
1. Select the required project where Interact needs to configured.
2. You will be navigated to the project dashboard.
3. On the left-hand side, you will find the “InteractWorkflow” option.
4. If your project is yet to be configured, select the click here option.
5. If you already opted for Smart Interact, the click here option will not appear, and it will redirect to the project configuration page.
5. Now, select the “Copy” option from the top – right corner of the “Project configuration” page.
6. Choose the “Project” from the drop-down to select from where the Interact configuration needs to be copied.
7. A confirmation message will appear on the screen, click on “Yes” option to proceed.
8. Now, configurations will be copied to this project, click on “Save” option.


