Use case
Use Case
Automating Language Detection and Translation
Objective: To automate the process of language detection and translation of user comments in an Excel sheet.
Problem statement: The company receives Excel sheets with user comments in multiple languages. Currently, the process of identifying the language and translating the text into English is performed manually.
Proposed Solution: Utilize HarmonyAI to automate the following steps:
1. Language Detection: The AI will first detect the language of the text in the Excel sheet.
2. Translation: The detected text will then be translated into English.
3. Output Generation: The translated text will be reviewed in the Interact page.
Let’s see how this process can be automated.
Setup the HarmonyAI Queues:
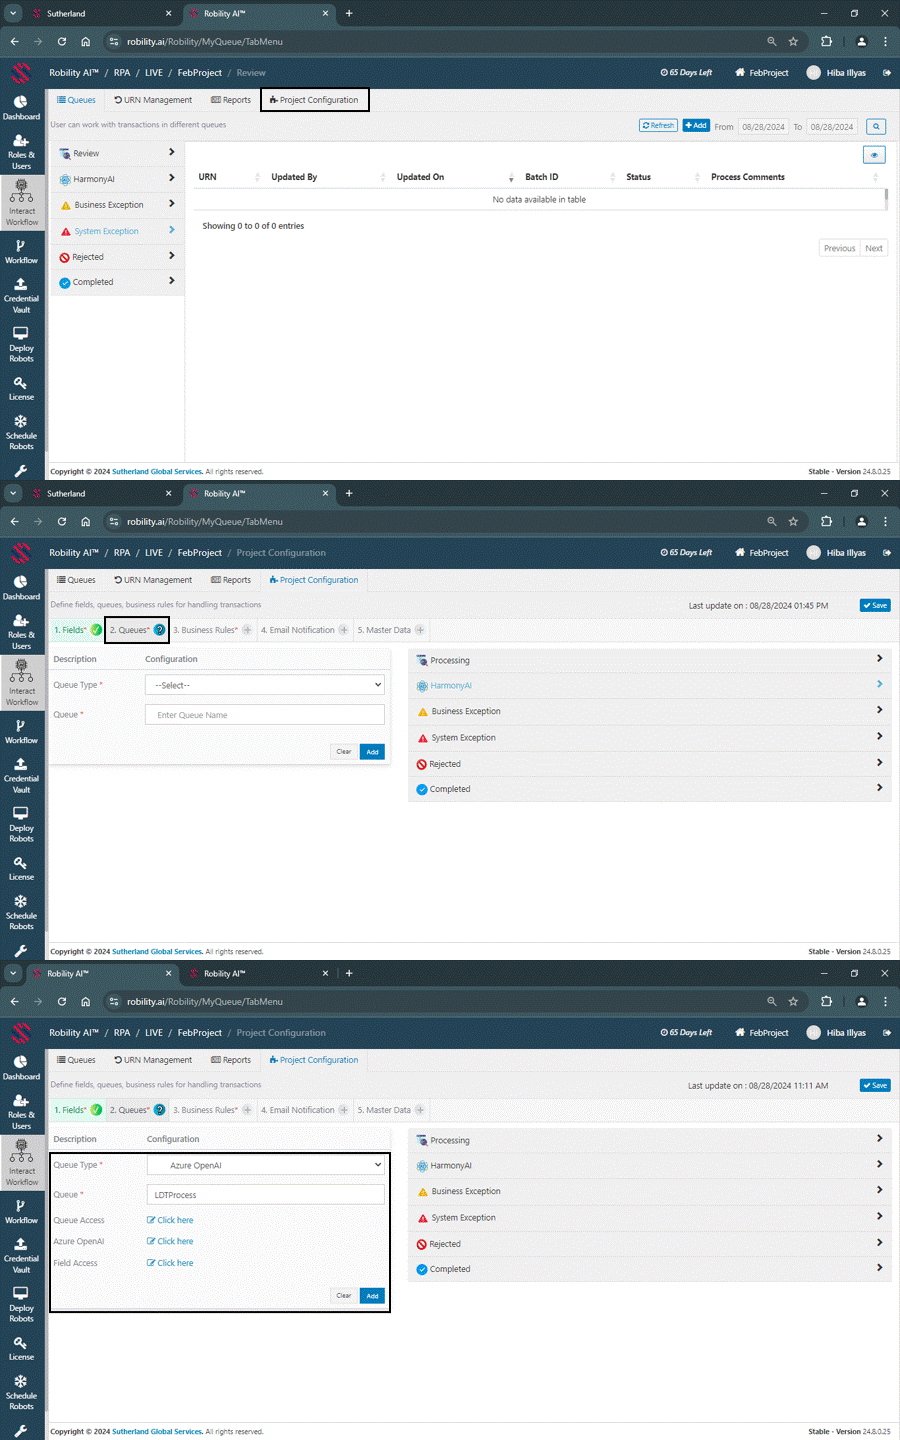
1. Login to the RobilityManager and navigate to your tenant.
2. Go to your projects and click on “Interact Workflow” option.
3. Select the “Project configuration” menu and navigate to “Queues”.
a. Ensure that the “HarmonyAI” is activated in your tenant. Click here to know how.
4. Provide the queue name as “LDT process”.
5. Choose the queue type as “Azure Open AI” under “GenerativeAI” model in HarmonyAI.
6. Once the queue type has been chosen, select the “Azure OpenAI” to launch the playground.
Configuring the AI Agent:
Now, in the “AI Agent” window, we are going to use a pre-built model and use it right away to achieve the expected output by defining instructions in the system prompt. The AI Agent is where you can integrate with the chosen model and test the results. In this case, we have selected the model type “Azure OpenAI.”
1. In the “Accelerators”, choose the service as “Language translator”.
a. Here we are choosing this service to detect and translate the language to English by default.
2. Let’s provide instructions to the AI to generate the required results.
3. In the “System Prompt”, currently it is trained to translate the text into specified target language.
a. Here provide the instructions as below,
“You are a language detection assistant. Your task is to identify the language of text inputs accurately. Ensure that the language detected reflects the actual language used in the text, and provide clear, concise information about the detected language. The detection should be precise, and the results should be easily understandable.”
1. Detect the language of the input text.
2. Translate the input text into the English.
Respond with the detected language and the translated text.
Input:
Text:
Detected Language:”
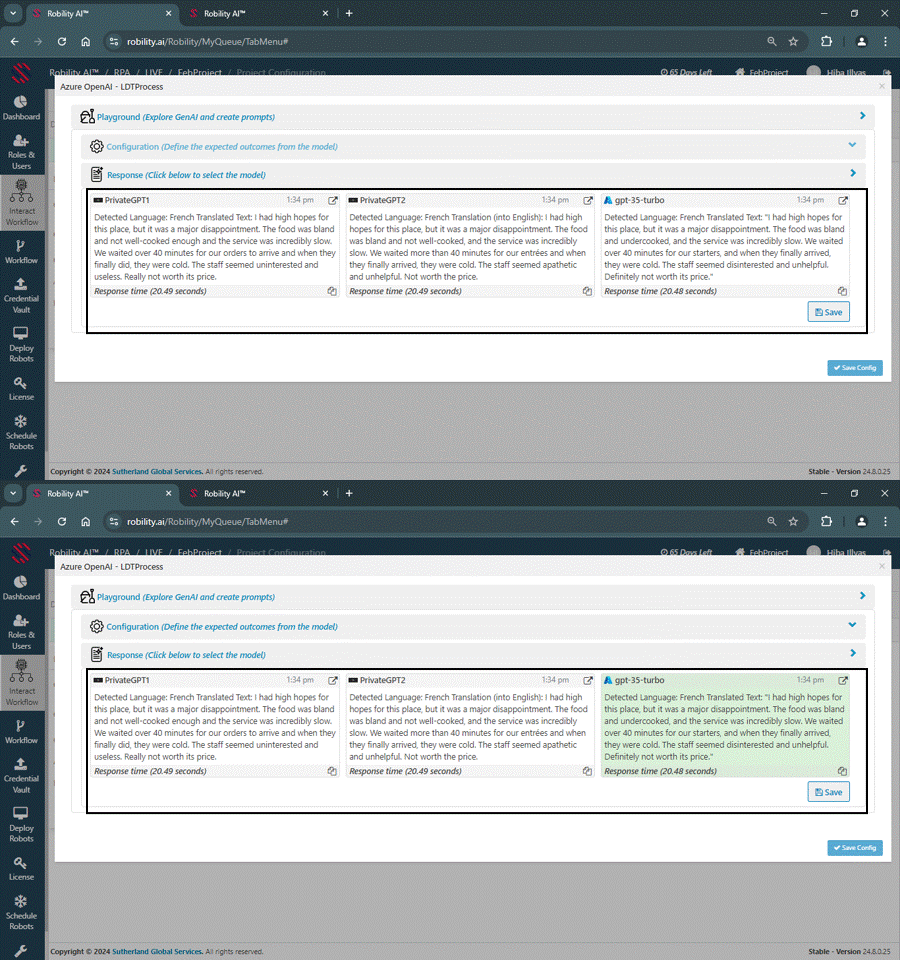
4. In the “User Prompt”, provide the text as below to test the AI,
“J’avais de grands espoirs pour cet endroit, mais ce fut une déception majeure. La nourriture était fade et pas assez cuite et le service était incroyablement lent. Nous avons attendu plus de 40 minutes pour nos entrées et quand elles sont finalement arrivées, elles étaient froides. Le personnel semblait désintéressé et inutile. Ne vaut vraiment pas son prix.”
5. Now click on “Generate” button.
6. Let’s wait for our responses and choose wisely and click on save.
Once you have chosen the respective model, click on “Save” button. Next you will be listed with taxonym for the fields and then click on save configuration button.
Provide queue access for the respective users and save the project configuration.
Live review of the process:
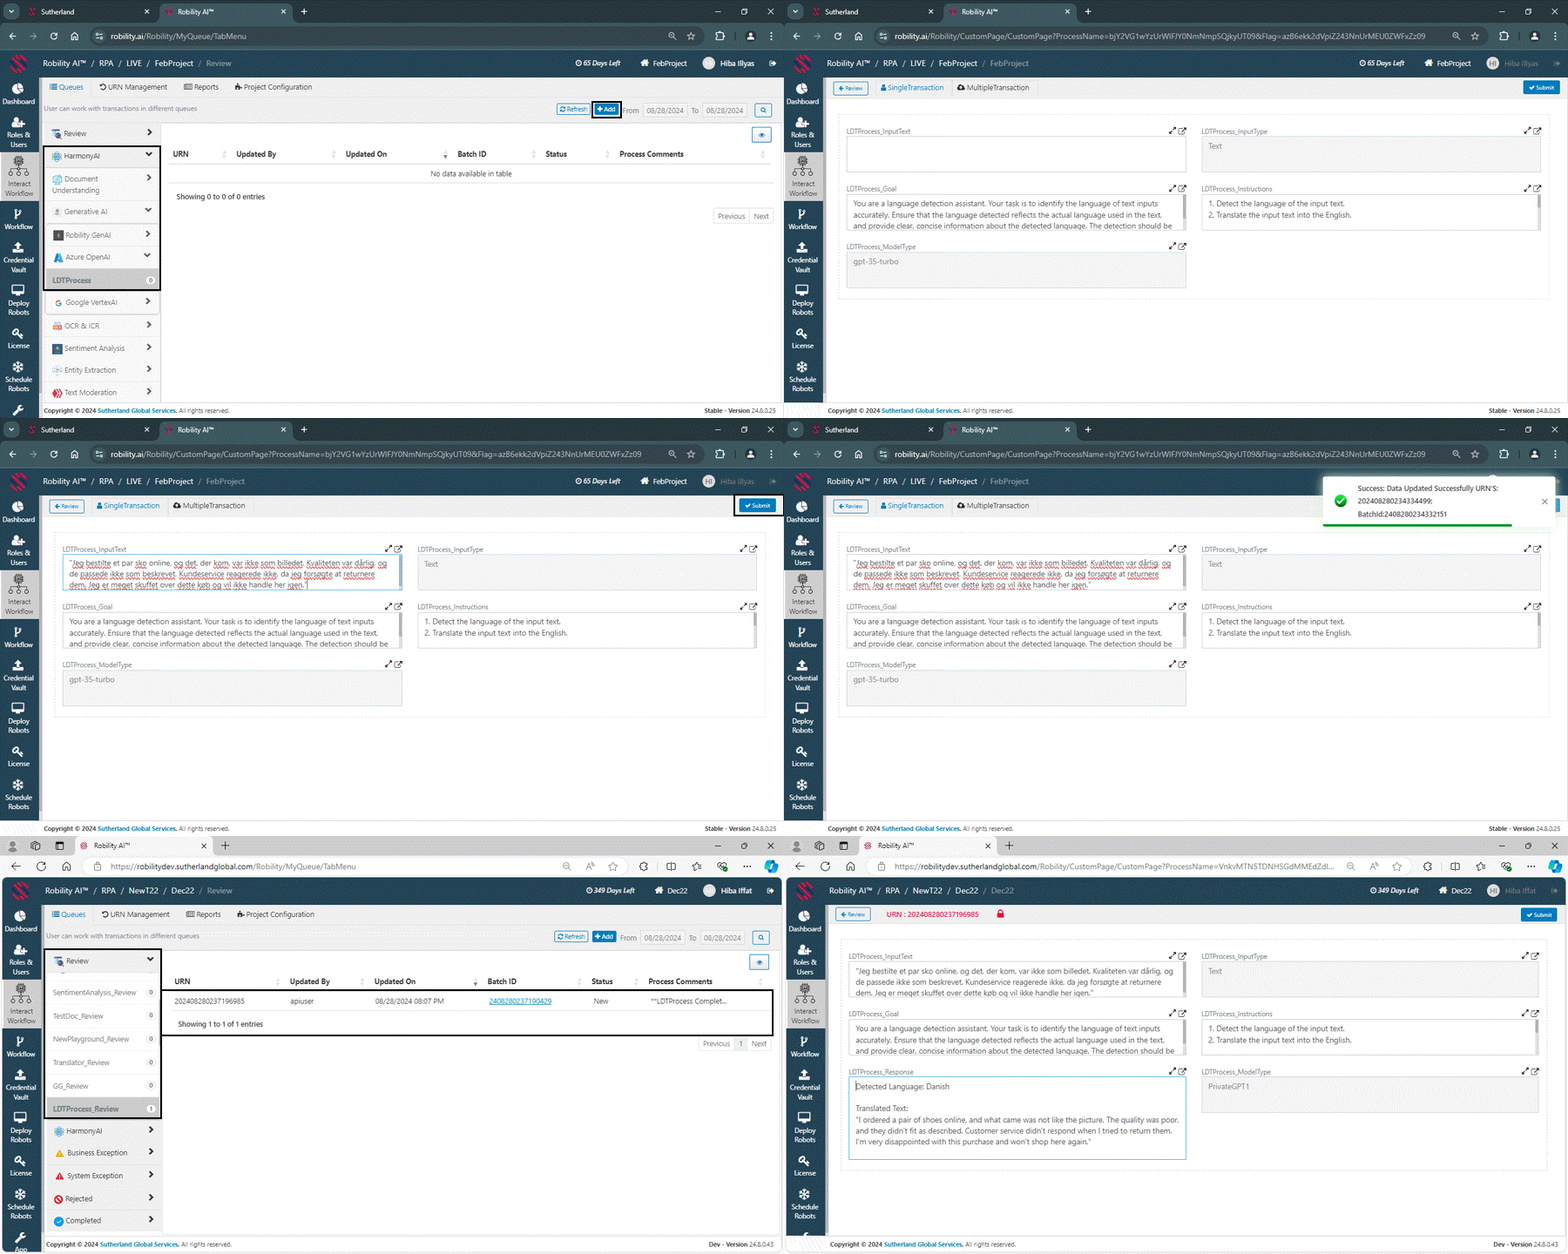
1. Now, navigate to the “Queues” page in the “Interact workflow” menu.
2. Click on the “HarmonyAI” queue and under the “GenerativeAI” queue, choose the “Azure OpenAI” queue and “LDTProcess” queue will be available.
3. Click on the “Add” option on the top of the page and you will be directed to add the transactions manually.
4. Provide any input text and click on “Submit” button.
5. Now, the cases will be added successfully and then the “HarmonyAI” starts to process the input data and translates them. The output will be moved to the “LDTProcess_Review” queue under the “Processing” queue section.


