Email Notification
Email Notification
Interact also allows for the setup of automated email notifications, keeping users informed of queue movements and changes throughout the process. This feature ensures smooth communication and transparency during automation workflows.
Why do we need this step?
1. Emails can act as a form of record-keeping. They provide documented evidence of the completed transaction, which might be needed for auditing, compliance, or future reference purposes.
2. Notifications allow for real-time monitoring. In case of errors or issues, they can trigger an alert to relevant personnel for immediate action.
3. It improves communication by informing relevant parties about the progress, completion, or any issues related to the transaction, maintaining transparency within the organization or between systems.
4. Integrating email notifications as part of the workflow can further automate the process, ensuring that stakeholders receive timely updates without manual intervention.
How to configure email notification in your project?
Let’s continue from the use case, here I am going to set the email address to notify whenever the transactions has been completed successfully or if there are any errors thrown during the runtime.
Follow the below steps,
1. Login to the Manager and navigate to the “Projects” where you have configured the Interact.
2. Click on the “Interact Workflow” and choose the “EmailNotification” step.
a. This is not a mandatory step while configuring the project. You can also skip this step to move forward.
b. In this case, I am going to add the “Email Address” with two different mail subjects.
3. There will be two options available “Bulk” index and “Manual” index notification. You can configure both of these, and you can also configure either of them.
4. Let’s first create the “Bulk Index” to send the notification configuration.
a. This notification will be triggered whenever the transactions are indexed as bulk to the project to the specified mail address along with the CC mail addresses provided.
b. Here I am specifying CC mail address as my mail address to send a notification to myself every time the transactions are uploaded.
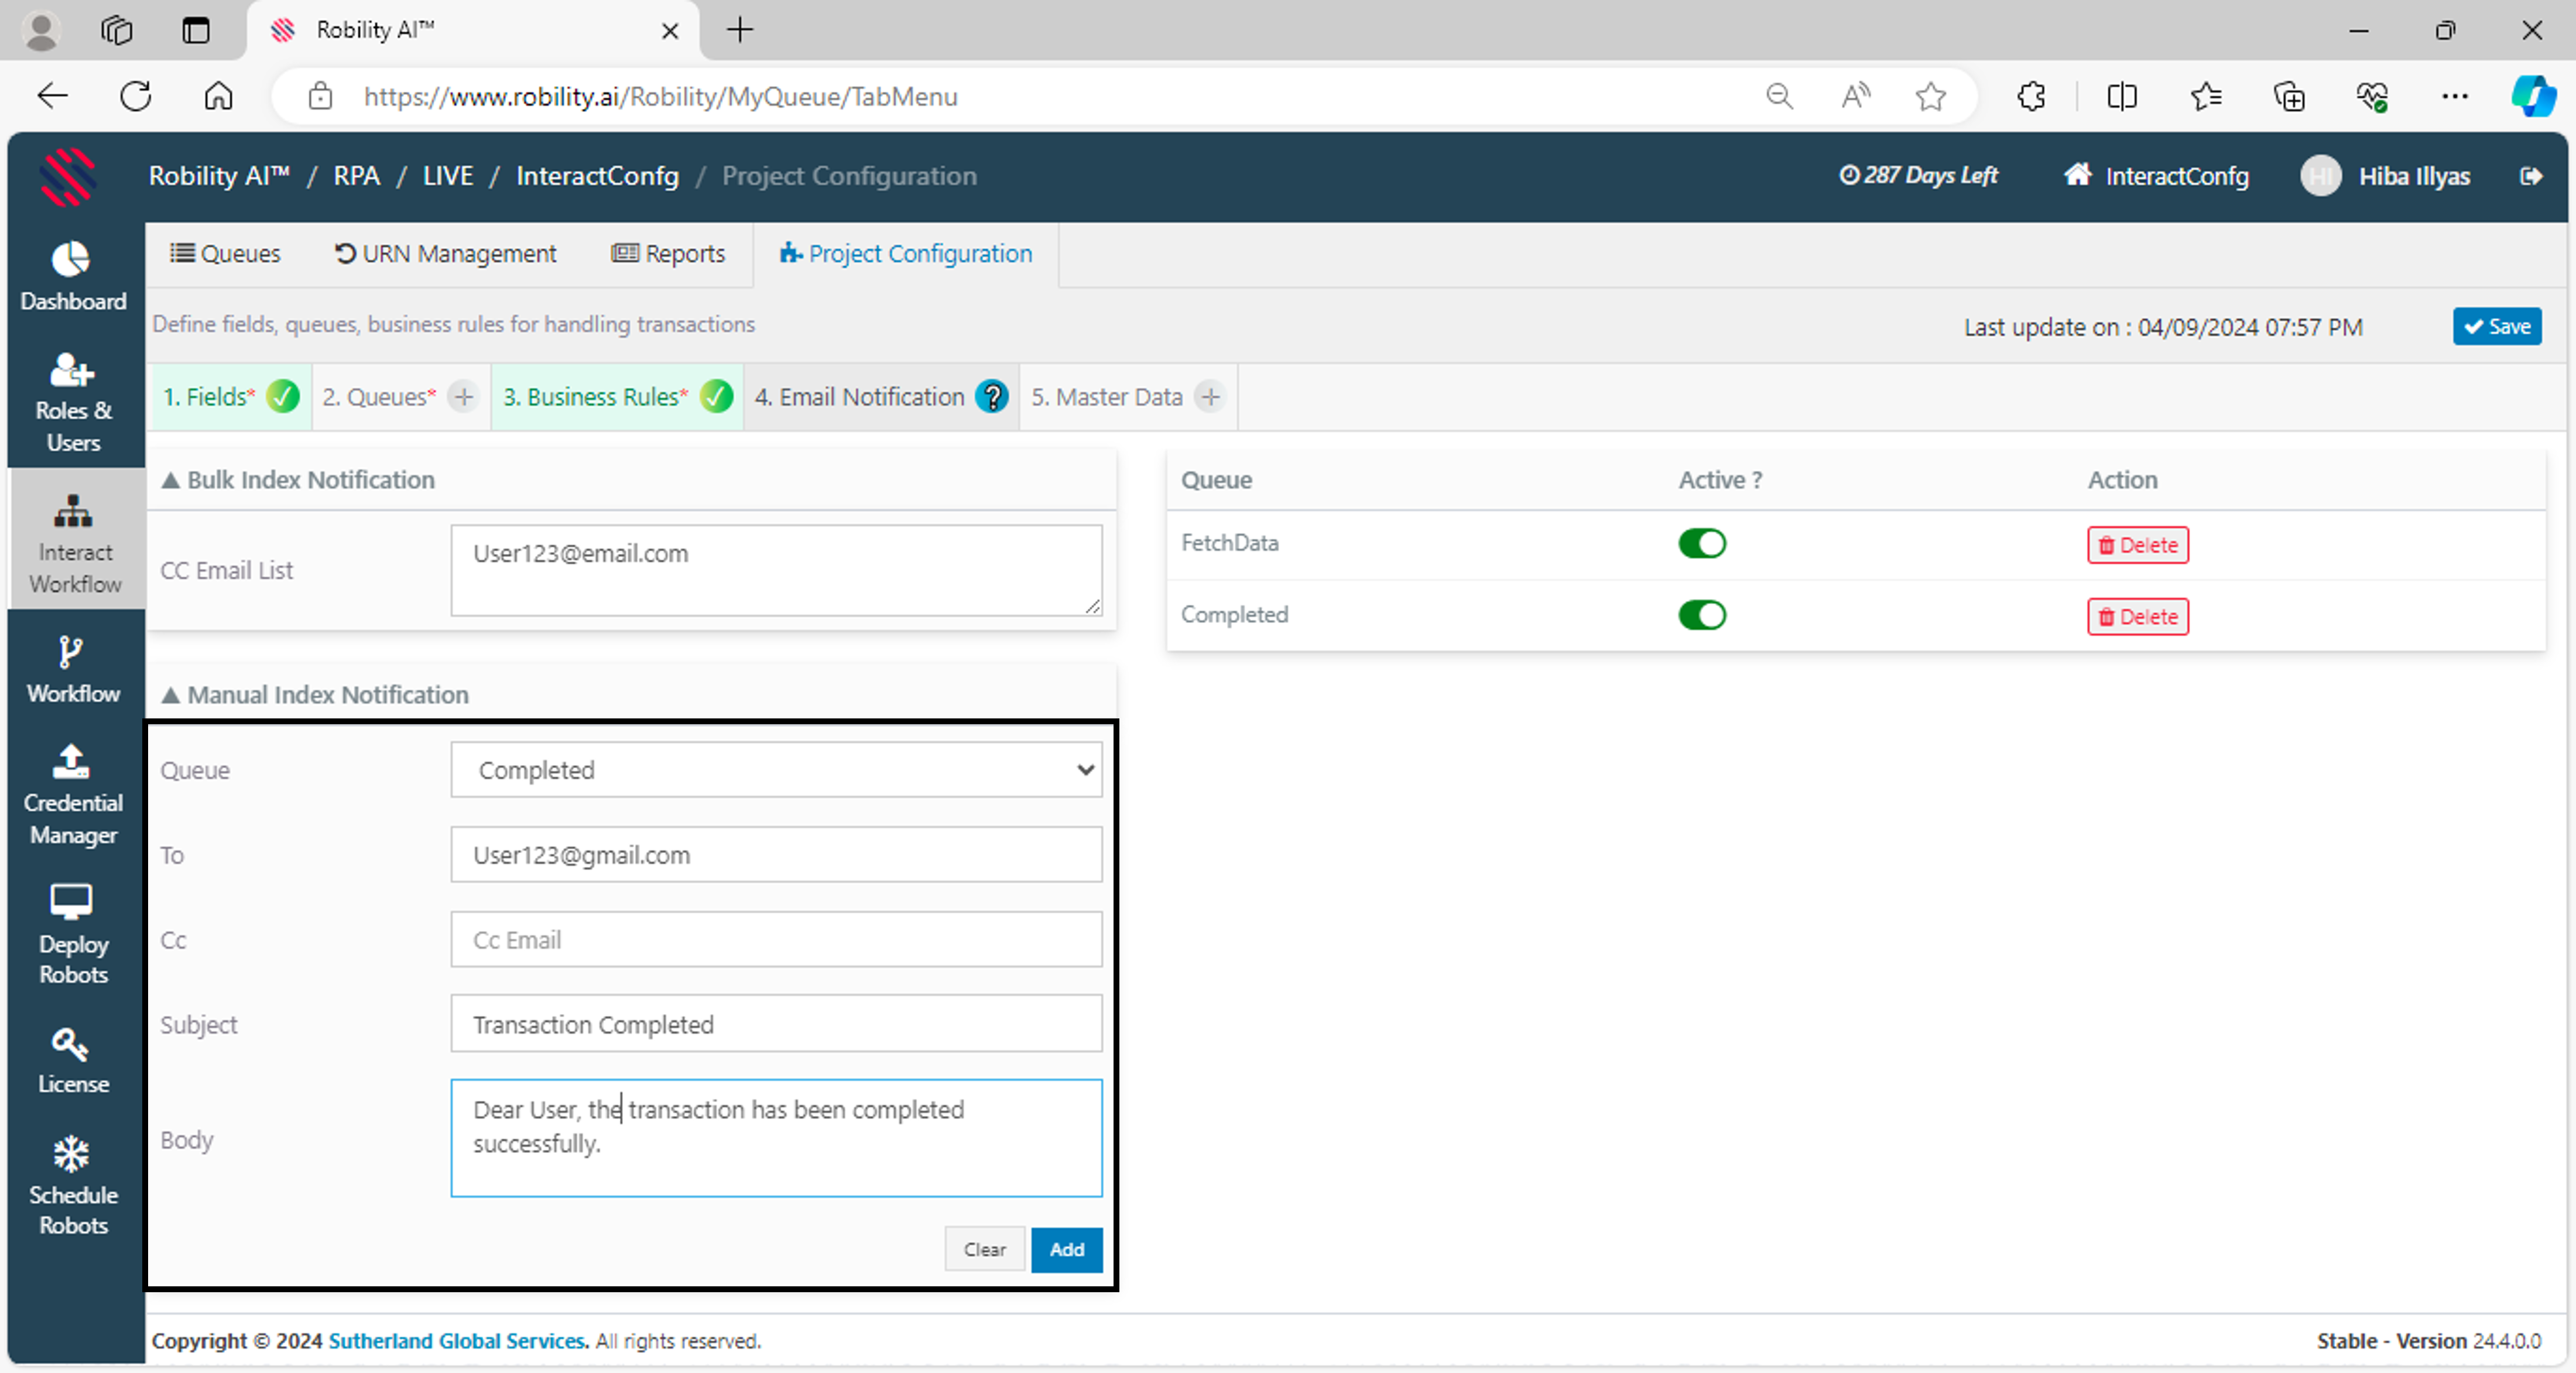
5. Next, moving to the “Manual index Notification” option.
a. Here, I am choosing the “Queue” name as “Completed”, so that once the transactions are moved to completed queue, an email will be triggered for each transaction.
b. Next, moving to the “TO” field, you need to mention the mail address to whom the notification needs to be triggered.
c. Next, “CC” field, here you need to mention the “CC” mail addresses. In this case, I left out this option.
d. Now, moving to the “Subject” to provide the subject for the mail to be notified.Here I am specifying the subject as “Transactions completed”.
e. Finally, the “Body” helps you to provide the content that needs to be sent along with the mail. You can configure the mail body as per project preference.
i. Here I am specifying the Body as “The transaction has been completed successfully.”
6. Now, Add and save the project.