Queue and Field Access
Queue Access
The queue access feature enables users to edit, add, view, and backpush items in the queue. It can also be used to monitor the progress of transactions. This allows the Tenant Admin to grant queue access to users within the project. Additionally, access to the queues for users interacting with the fields through the API can also be configured.
User Access:
The list of usernames will be displayed from the users who has access to the project. By default, all users will be configured to “No access”, the tenant admin can change this accordingly.
1. No Access – By enabling this, the users will not be able to add, edit, view or backpush the transactions against the queues.
2. Add – By providing this access, it enables the user to add the inputs for the queue. For e.g., adding the cases for the process execution.
3. Edit – By providing this access, it enables the user to edit the transactions against the queue.
4. View – By providing this access, it enables the user to only view the transactions against the queue.
5. Backpush – Backpush refers moving the transaction from one queue to another queue. By providing this access, it enables the user to backpush the transactions.
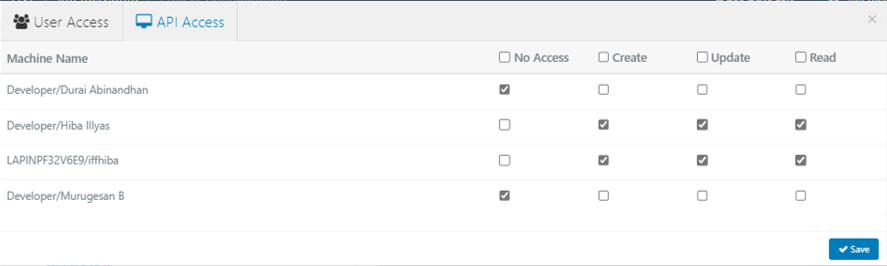
API Access:
The list of usernames will be displayed from the users who has access to the project. By default, all users will be configured to “No access”, the tenant admin can change this accordingly. This access is provided to access fields for the developers who execute the bot through Designer and Runner using an API. When the users are accessing through API, the users will not be able to backpush the transactions.
The list of developer’s name and resources name added inside the tenant will be available here. You need to provide the following access,
1. No Access – By enabling this, the users will not be able to add, edit, view or backpush the transactions against the queues.
2. Create – By providing this access, it enables the user to add the inputs for the queue. For e.g., adding the cases for the process execution.
3. Update – By providing this access, it enables the user to modify or update the transactions against the queue.
4. Read – By providing this access, it enables the user to only view the transactions against the queue.
Feed type:
While providing queue access to the user, at the bottom of the pop-up wizard, you will find the “Feed Type” drop-down. There are two feed types, Manual and Auto.
1. Auto: If Auto is selected, after processing of any transaction in a given queue is completed, it will not be routed back to MyWorklist and then rerouted to the next configured queue. Each transaction will automatically move to the next queue.
2. Manual: In the case of manual selection, before progressing to the next queue, the URN will go to My WorkList and has to be picked up from there for the next level of processing. Only after that will it move to the next queue. Again, after processing is completed in this queue, the URN will move to My WorkList and so on and so forth.
Field Access
This field occurs only for Processing queue. It enables to view and edit only the selected fields to process while execution of the automation. It ensures that only the chosen fields are involved in the automation, enhancing efficiency, and reducing unnecessary data manipulation. This granular approach empowers users to tailor the automation’s behavior to their precise needs, contributing to a more optimized and effective workflow.
1. Show – By enabling this option for against the fields, the user will be able to display the fields in the queue name.
2. Edit – By enabling this option for against the fields, the user will be able to modify the fields in the queue name.
Both show and edit access can be provided for the fields.
