Setting up Azure AD
Robility Manager allows users to authenticate using Microsoft Azure App registration. The Organization Administrator who creates the tenant will be responsible for configuring it. If the organization’s tenant admin has already completed Azure App Registration, they can connect it to their tenant directly with existing user account.
If you have decided to use Azure AD for your organization, please ensure that you have followed the steps below.
Pre-requisites
To configure with Azure AD, the following are the pre-requisites,
1. The Organization Administrator needs to acquire Enterprise license.
2. Needs Administrative access in both Robility Manager Cloud and Azure AD account. If you do not have administrator access, coordinate with Azure admin to complete the process.
To create an application, kindly follow the below steps. Here we are configuring the account and have to setup against each menu.
Steps to configure
A. App registration:
1. To create an app registration in your account with Organization business mail ID, click here.
2. Select App registration under Azure services.
3. Click on the New registration.
4. Enter the name for the application. This can be changed later.
5. Under Support account types, select only “Accounts in the Organizational directory only” to configure the access for the Application/API.
6. Under Redirect URI, select the platform as “WEB” and set the Redirect URI as WebsiteURL+SSO/SSOAuthCheck.
7. Then click on the Registration button.

Now that the app has been registered, we are going to configure the Azure for integration. Follow the below steps:
B. Application Overview:
Once the application has been registered, the user will be able to view the application name under “All Applications” field.
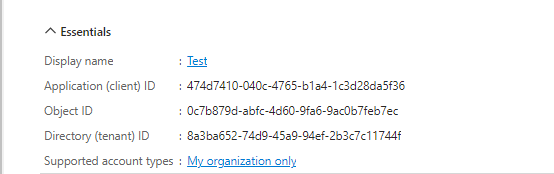
1. Click on the application name and you will be redirected to the Application overview page.
2. Under Essentials, you can find the Application (Client ID) and Directory (TenantID), this can be viewed anytime. But when integrating with Robility Manager under Azure AD authentication, the Client ID, Tenant ID will not be required.
C. Authentication page:
1. Navigate to the Authentication page on the left-hand side of the page.
2. Under the Redirect URIs, enter the “website url + /SSO/SSOAuthCheck”.
3. Under Implicit grant and hybrid flows, select the token authentication as “ID Tokens”.
4. Now, click on save.
To learn more about Implicit grant and hybrid flows, follow the documentation –https://learn.microsoft.com/en-us/azure/active-directory/develop/v2-oauth2-implicit -grant-flow

D. Token Configuration page:
1. Navigate to the token configuration page from the left-hand side menu.
2. Select Add Optional Claim.
3. Under Token type, select ID.
4. Select the check boxes for family_name ,given_name, and upn to add them as optional claims.
To learn more about optional claims configuration, follow the documentation – https://learn.microsoft.com/en-us/azure/active-directory/develop/optional-claims .
E. API Permissions page:
1. Navigate to the API Permissions from the left-hand side menu.
2. Click on “Add permissions” button.
3. A pop will be opened to request API permissions. Select “Microsoft Graph API”.
4. Then choose “Delegated permissions” under it.
5. Under OpenID permissions – choose email, OpenID, profile.
6. Under Group member permissions – choose GroupMember.Read.All.
7. Under User permissions – choose User.Read, User.ReadBasic.All.
8. Select the Grant Admin consent checkbox.
For more information about the access and permissions, see the Azure AD permissions documentation.
F. Certificates and Secrets:
Under the certifications and secrets page, you need to create a new client secret for your account. Follow the below steps to create a client secret.
1. To learn how to Create a client secret, follow the documentation steps – https://learn.microsoft.com/en-us/azure/active-directory/develop/quickstart-register-
app#add-a-client-secret
2. Take note of the secret code and save it to use later. But this is not required for the integration with Robility Manager under Azure AD authentication.
Now, the configuration set up has been completed for the app registered. Once all the above steps have been completed, the admin can integrate with Microsoft.
