Configure tools for agents
You can extend an agent’s functionality by configuring tools linked to it.
Edit a tool’s Component Actions
When you set a component to Tool Mode or Tool Output, its actions (functions) become available for agents to use. These actions are listed in the component’s Actions list.
You can customize each action’s label, description, and availability to guide the agent in using the tool effectively and to prevent it from executing irrelevant or undesired actions.
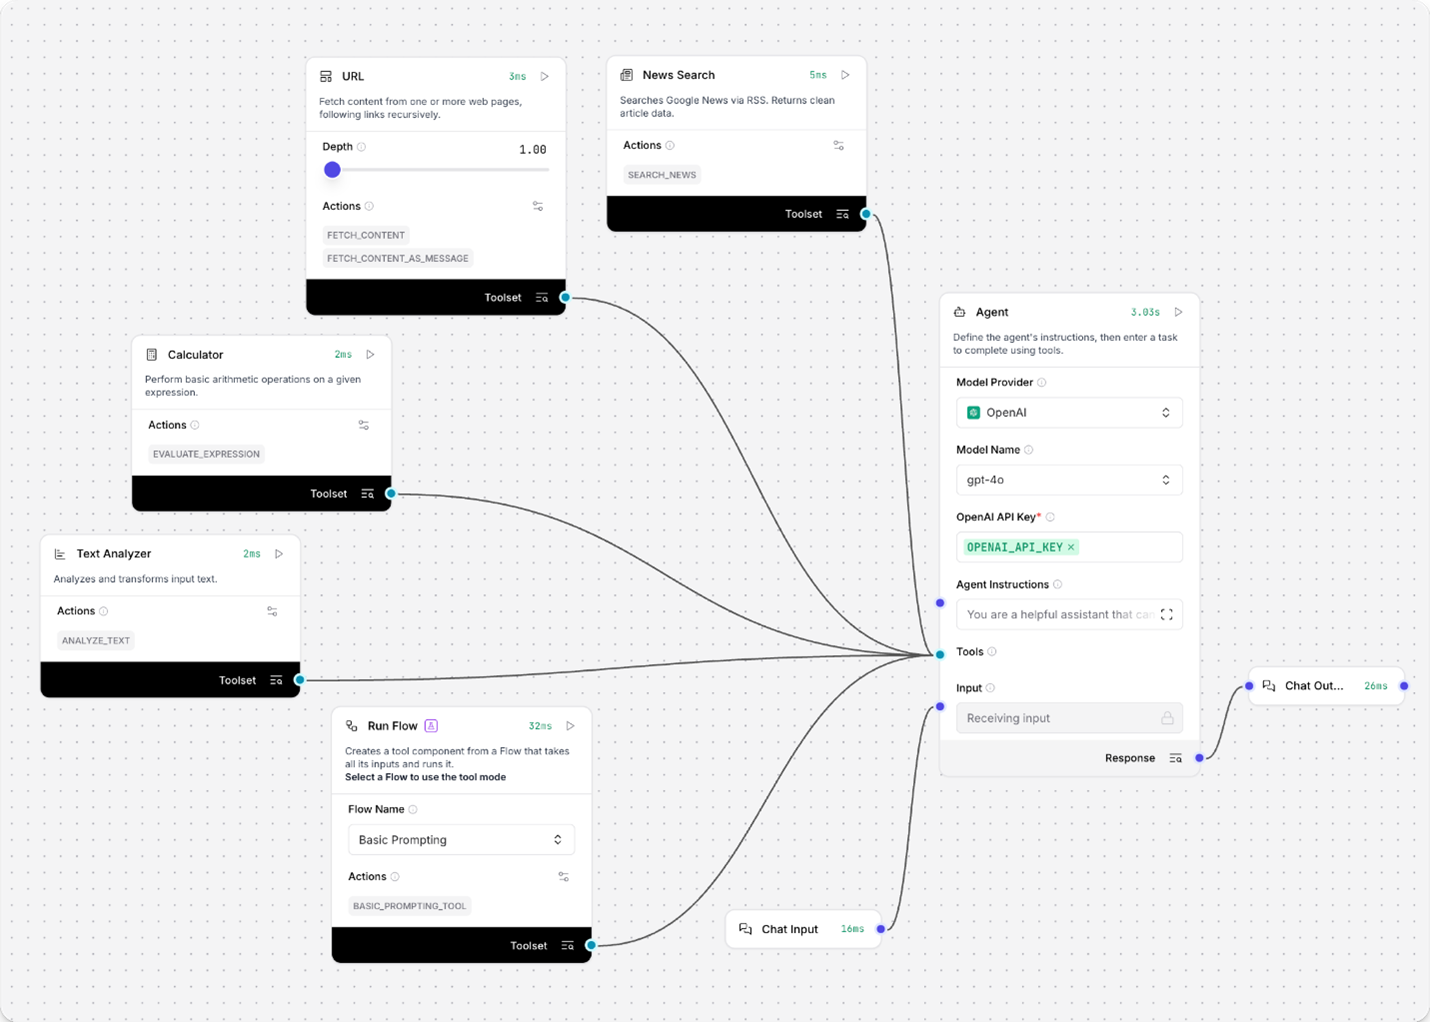
For example, when Tool Mode is enabled, the URL component offers two available actions:
| Tool Name | Description | Enabled |
|---|---|---|
| fetch_content | Fetch content from web pages recursively | true |
| fetch_content_as_message | Fetch web content formatted as messages | true |
Each Robility Flow Agent interprets a tool’s purpose based on its name and description metadata. These fields are essential for guiding the agent’s behavior. The enabled field (a boolean) determines whether a tool is available for the agent to use.
If an agent appears to misuse a tool, consider updating the tool’s description metadata to clarify its intended use. While you can freely edit tool names and descriptions, default tool identifiers cannot be modified. To use a different identifier, create a custom component.
Using an Agent as a Tool
The Agent component itself supports Tool Mode, enabling the creation of multi-agent workflows.
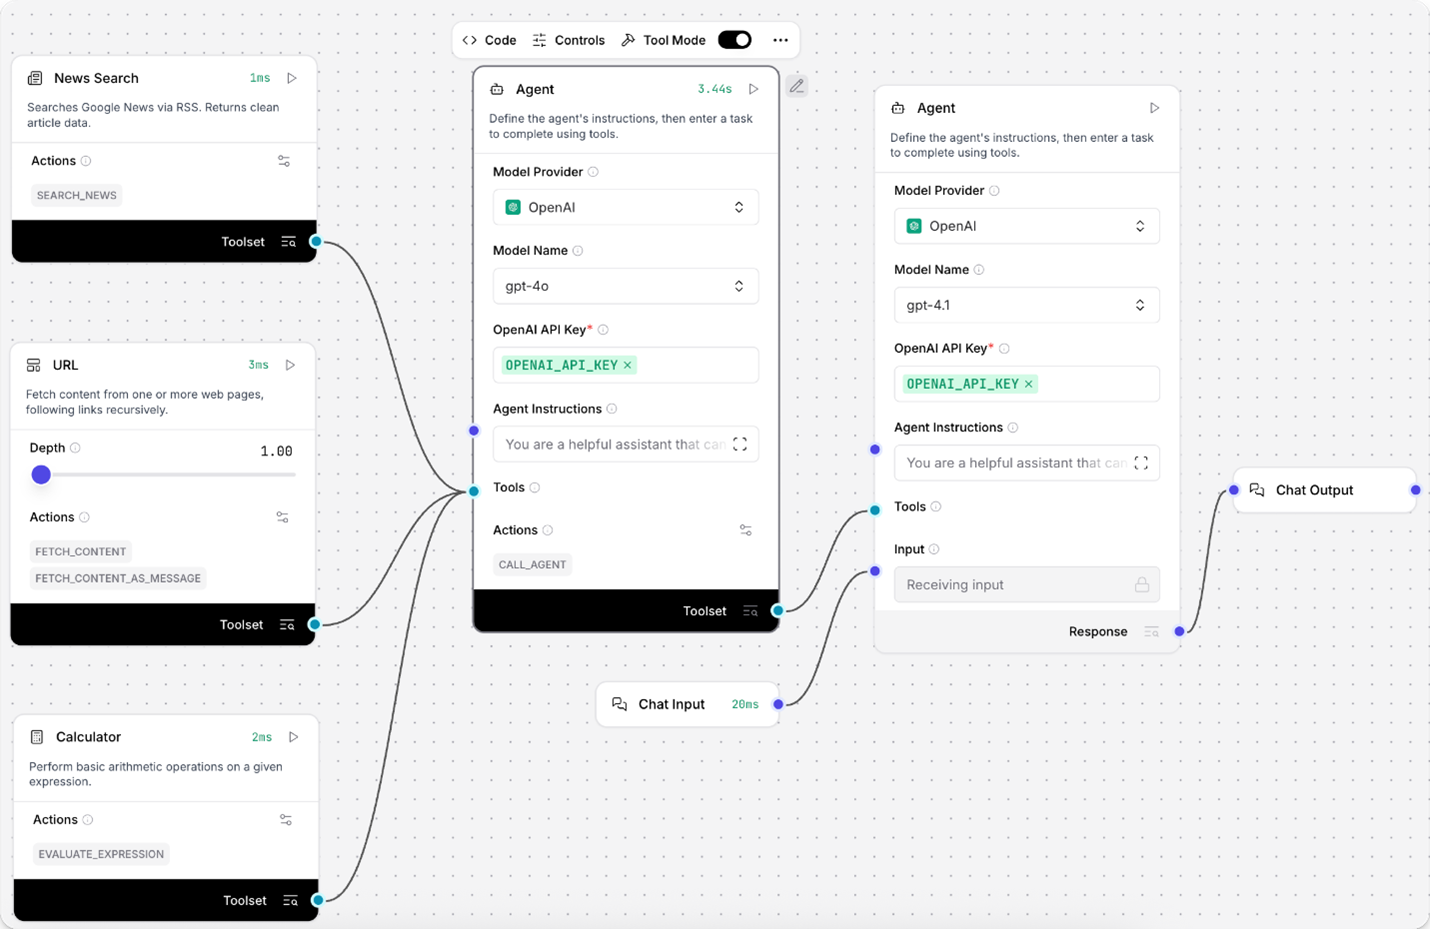
For example, you can add an agent that uses a different OpenAI model (such as gpt-4.1) to handle tasks requiring a larger context window, like scraping or deep search. Here’s how:
1. Create the Simple Agent Starter Flow.
2. Add a second Agent component to the flow.
3. Provide your OpenAI API key in the new Agent component.
4. In the Model Name field, choose gpt-4.1.
5. Enable Tool Mode to configure this agent as a tool.
6. Connect the Toolset port of the new agent to the original agent’s Tools
Now, the first agent can leverage the second agent—with its own language model and capabilities—as a tool for handling complex or extended-context tasks.
7. You can update the agent’s actions to guide how it should be used. Click Edit Tools to change the tool’s name, description, or its enabled status.
For example, the default name is Agent. You can rename it to Agent-gpt-41 and update the description to: Uses the gpt-4.1 model for complex problem solving.
This helps the connected agent understand that the tool is specifically for tasks requiring a larger context window and should be used accordingly.
Use Custom Components as Tools
Agents can also interact with custom components as tools.
To add a custom component to an agent flow:
1. Click New Custom Component in the flow editor.
2. Add your custom Python code in the component’s Code pane.
a. For example, to build a text analyzer tool, paste the corresponding code snippet into this section.
3. Click Tool Mode to configure the custom component to function as a tool.
4. Link the custom component’s Tool Output to the agent’s Tools Input to establish the connection.
5. Open the Playground and give the agent an instruction such as:
Use the text analyzer on this text: “Agents really are thinking machines!”
The agent will now recognize and execute the custom tool as part of its response.
Response:
AI
gpt-4o
Finished
0.6s
Here is the analysis of the text “Agents really are thinking machines!”:
Original Text: Agents really are thinking machines!
Word Count: 5
Character Count: 36
Sentence Count: 1
Reversed Text: !senihcam gnikniht era yllaer stnegA
Uppercase Text: AGENTS REALLY ARE THINKING MACHINES!
The agent successfully invokes the analyze_text action and returns the result in the Playground.
Using Any Component as a Tool
If a component does not include a Tool Mode button, you can still configure it as a tool by setting tool_mode=True on one of its inputs. Then, connect the component’s Toolset Output to the agent’s Tools Input.
Supported Input Types for Tool Mode in Robility Flow:
Robility Flow supports Tool Mode for the following input types:
a. DataInput
b. DataFrameInput
c. PromptInput
d. MessageTextInput
e. MultilineInput
f. DropdownInput
For example, in the earlier scenario, tool_mode=True is added to the MessageTextInput input, enabling the custom component to function as a tool.
inputs = [
MessageTextInput(
name=”input_text”,
display_name=”Input Text”,
info=”Enter text to analyze”,
value=”Hello, World!”,
tool_mode=True,
),
]
Use Flows as Tools
Agents can leverage saved flows from your workspace as tools by using the Run flow component.
1. Drag the Run flow component into your workspace.
2. Choose the flow you want the agent to access as a tool.
3. Enable Tool Mode on the component. This allows the flow to appear as an available action.
4. Connect the tool output of the Run flow component to the agent’s tools input.
5. Instruct the agent by asking, “What tools are you using to answer my questions?” — the connected flow will be listed among the tools.
6. Ask the agent to use the specific tool to answer your question. The flow will execute and return a response based on its internal configuration.
Example: A Basic Prompting flow connected as a tool may return different results depending on the selected LLM and prompt setup.