Build Flows
A flow represents the logical sequence of an application workflow. It receives input, processes it, and produces output through a set of configurable components. Each component corresponds to a specific task in your application, such as connecting to a data source or invoking an AI model.

Robility flows are fully serializable meaning they can be saved and reloaded from the file system where Robility Flow is installed.
Quick Start Tip
To quickly get started with flow creation and execution, refer to the Robility Flow Quickstart guide.
Creating a Flow
You can create flows in Robility Flow using the following methods via the user interface:
1. Blank Flow: From the Projects page, select a project and click New Flow to start from scratch.
2. Flow from Template: Choose a project and select New Flow to create a flow using pre-defined templates.
3. Import a Flow from local: You can load an existing local flow file directly during the new flow creation process.
You can also create a flow with the Robility flow API, but the Robility flow team recommends using the visual editor until you are familiar with flow creation.
Creating a flow in local (Deprecated)
Creating flows in local mode has been deprecated. All new flows are now created and assigned directly to the specified project within Robility Manager.
You can still import an existing local flow file during the creation process. However, if no project is assigned to the user, flow creation will not be permitted.
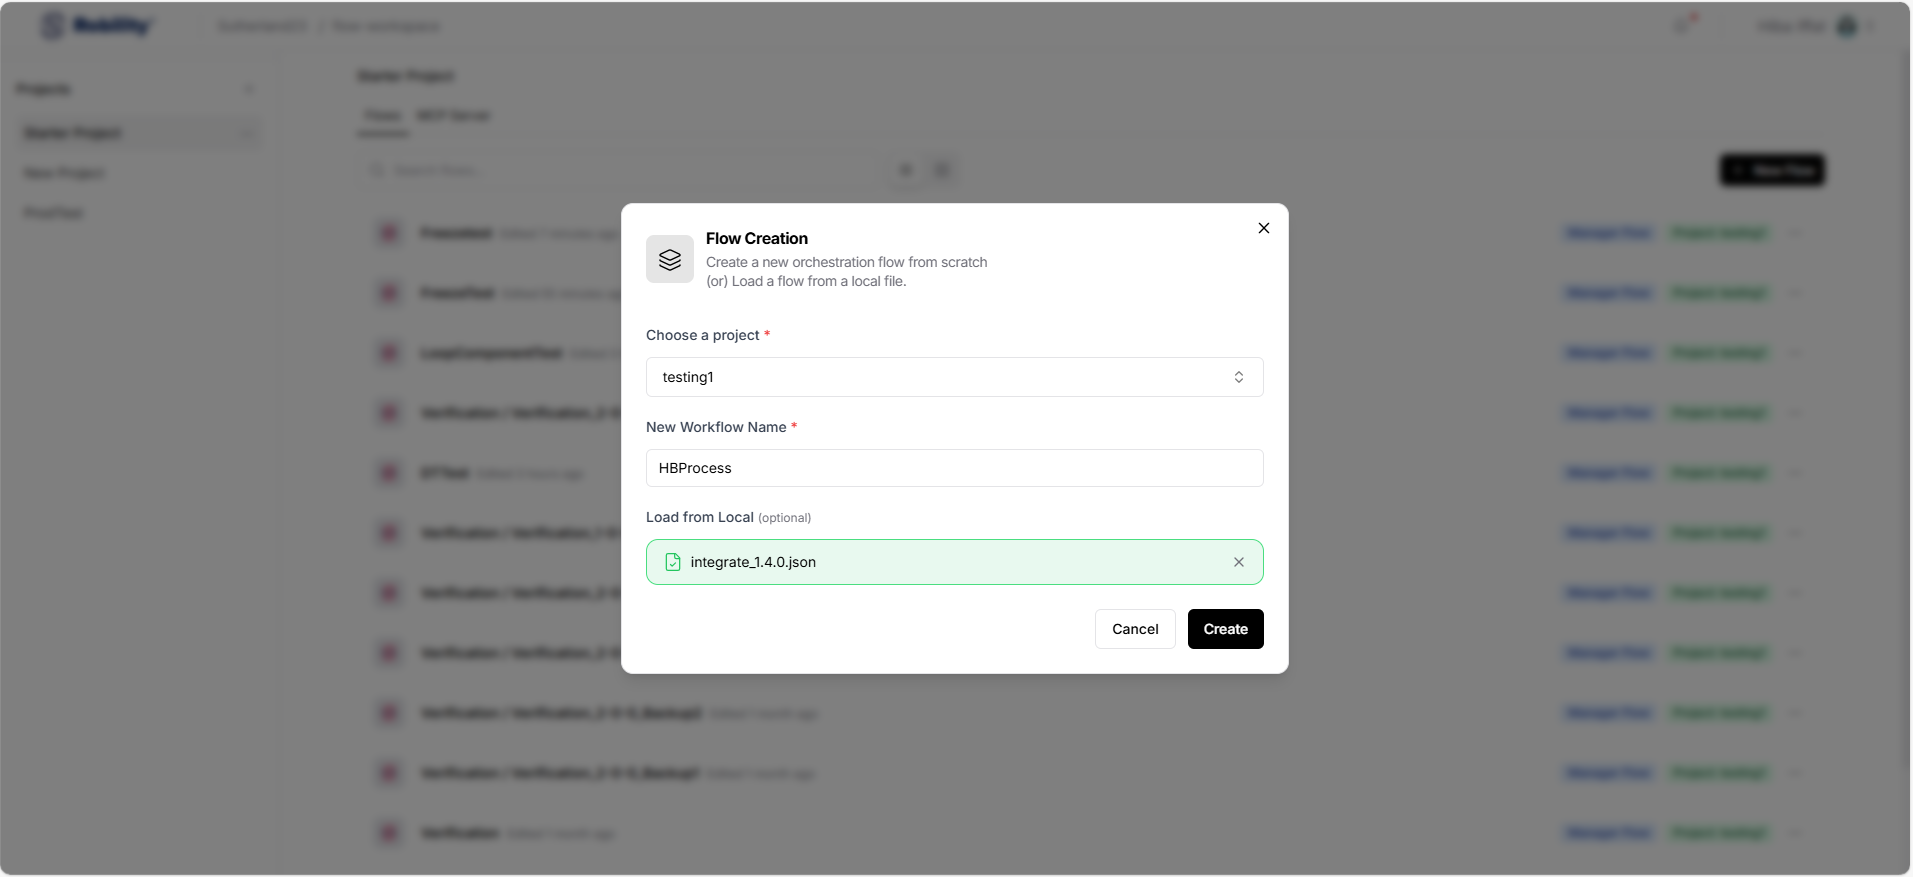
Creating a Flow in Robility Manager
All flows are mapped to a specific project within Robility Manager, enabling seamless automation and access to project-level resources such as Vault, API keys, Data Tables, and File Manager.
You can either create a new workflow or use an existing workflow that has already been published in Robility Manager.
Templates
Templates are pre-built flows that you can use as a starting point for your own flow. They range from basic flows with a few components to complex flows with many components and sub-flows.
For example, the Basic Prompting template demonstrates a small flow that passes both chat input and pre-defined instructions (as a prompt) to an LLM. In contrast, the Vector Store RAG template consists of two sub-flows that demonstrate how to create a Retrieval Augmented Generation (RAG) chatbot. One sub-flow populates the vector store with contextually relevant data and embeddings, and the other sub-flow queries the vector store for similar data to answer user questions.
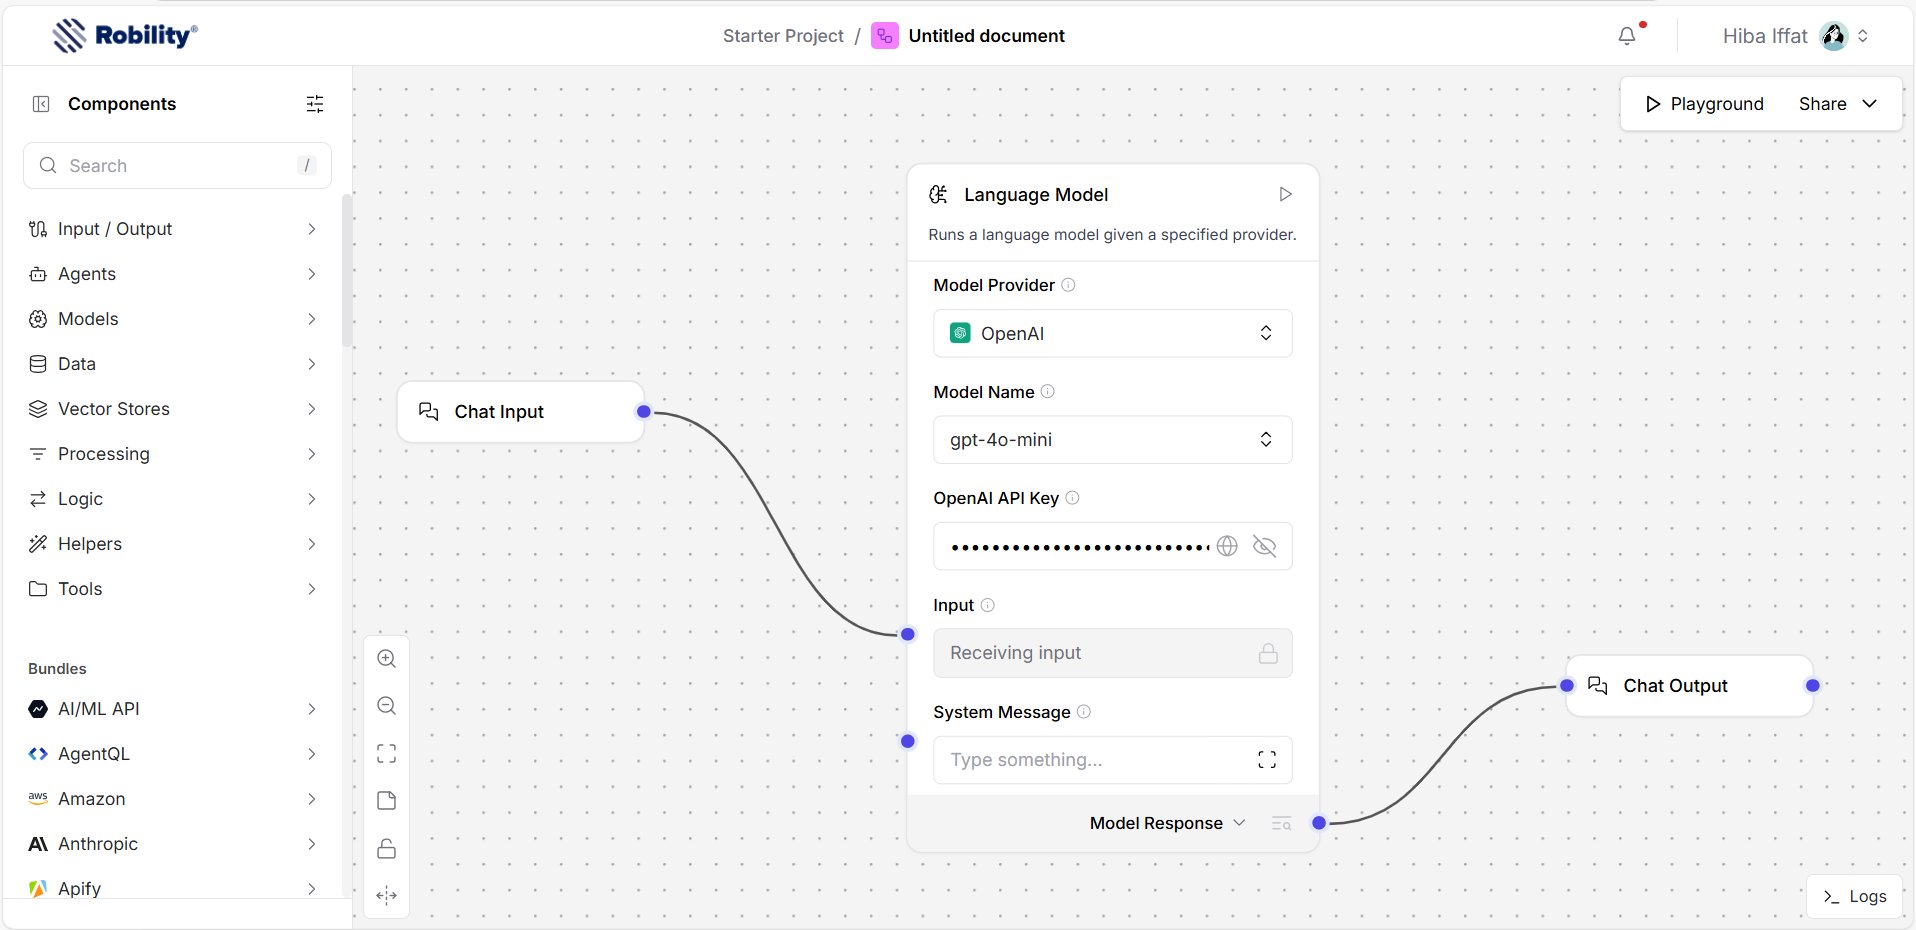
Adding Components to a Flow
Flows are built using components, which are modular nodes representing individual tasks. You can add and configure components in the Robility Flow visual editor.
Steps:
1. Drag and Drop: Use the Components panel to drag components into your flow workspace.
2. Configure: Set up each component by defining its configuration properties. These may include inputs, outputs, parameters, and credentials.
3. Connect Components: Use edges (ports) to connect components. These ports define the type of data transferred between nodes, for example, text strings or structured objects.
For more information on component types, configuration, and support port types, refer to the Components Overview section.
Run a flow
Once your flow is designed, you can:
1. Test in the Playground: Validate the prototype by executing it in a safe, interactive environment.
2. Trigger via API: Use the Robility Flow API to programmatically invoke flows.
3. Explore Advanced Options: Configure custom dependencies or containerize your flow for deployment.
For production readiness or external access, refer to the Robility Flow Deployment Overview for guidance on setting up an MCP (Managed Control Plane) server.
Flow graphs
When a flow runs, Robility Flow builds a Directed Acyclic Graph (DAG) from the components and their connections. The system then:
1. Calls each component’s def_build function to validate and initialize it.
2. Sorts nodes based on dependency order.
3. Executes each node sequentially, passing the output to downstream components.
This architecture ensures efficient and predictable execution.
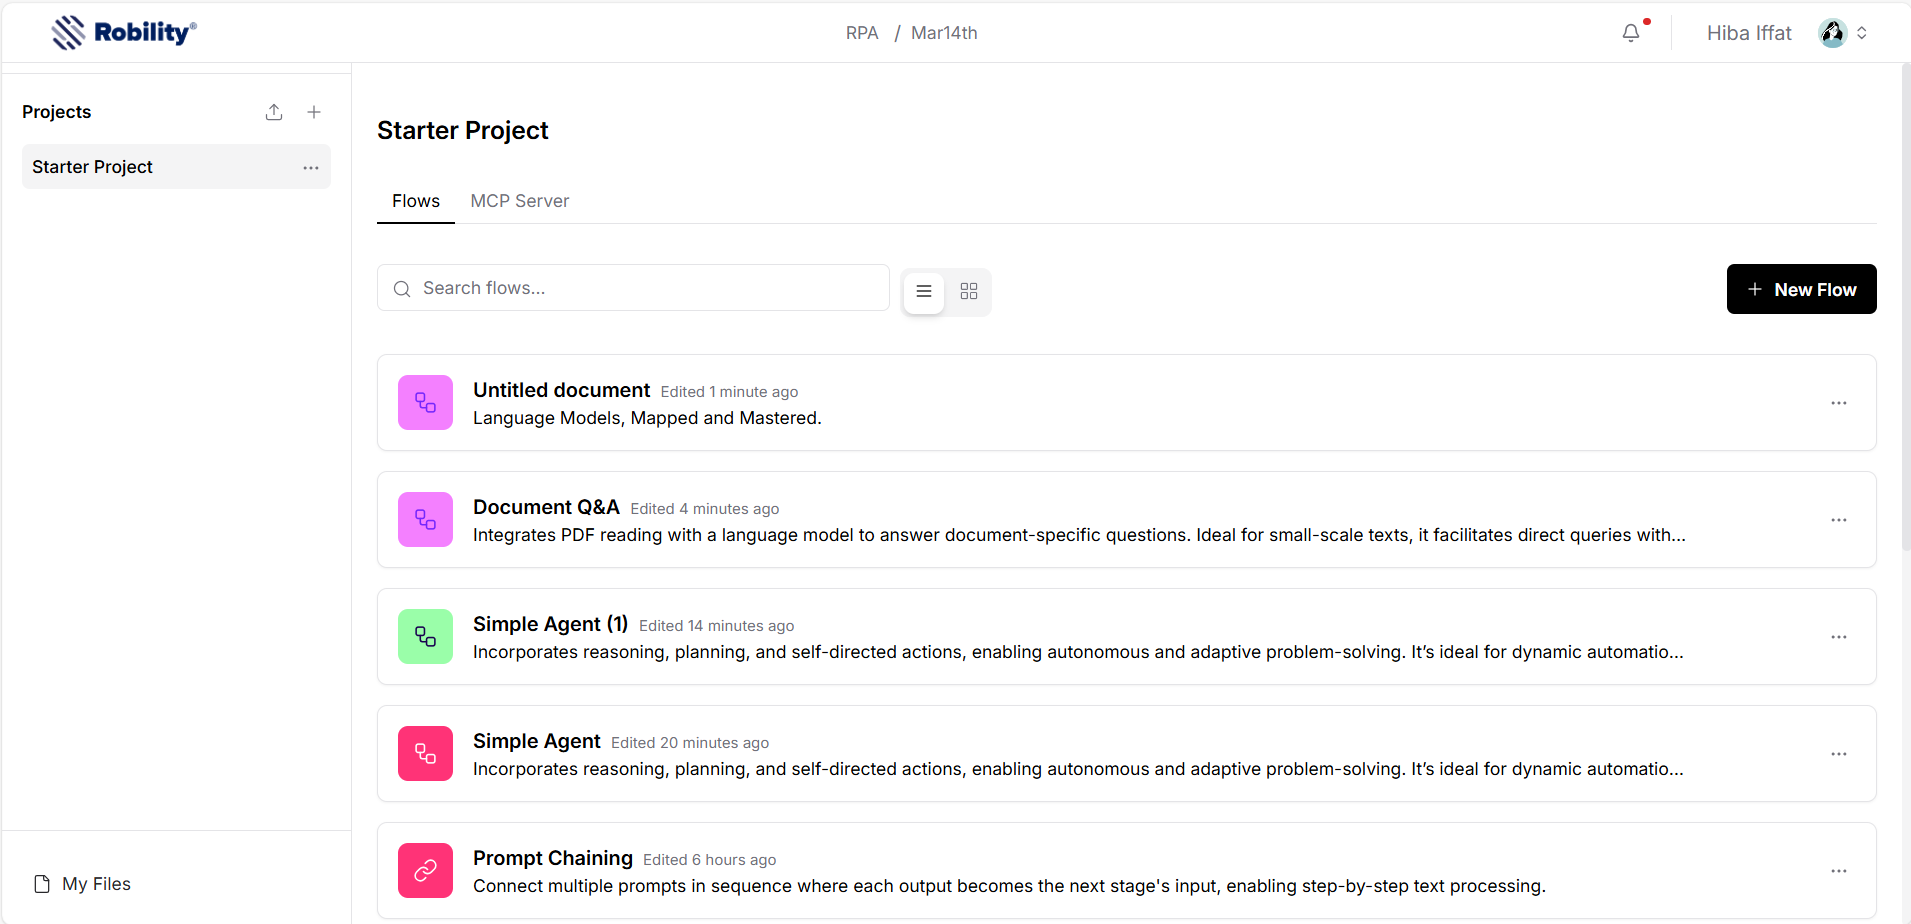
Manage flows in projects
The Projects page serves as your main hub for managing flows.
Organize Flows
Projects act as containers to group related flows. The default project is Starter Project, but you can create new ones as needed.
Project Operations
1. View Flows: Select a project from the Projects list.
2. Create Flows: Use the methods outlined in Creating a Flow.
3. Edit Flow Details: Click More on a flow and select Edit Details.
4. Delete Flow: Select Delete from the More menu.
5. Serve as MCP Tools: See Using Robility Flow as an MCP Server.
To create a new project, click Create New Project.
Version History
The Version History feature enables users to save and restore different versions of flow. This functionality supports change tracking and allows reverting to previously saved states when required.
Saving a Flow Version
Steps
1. Open the flow to be saved.
2. In the Flow Editor sidebar, select Version History.
3. Under Current (Working Version), click Save.
4. In the confirmation prompt, select Publish to save the current flow as a new version.
Outcome
1. A new version (for example, v1) is added to the Version History list.
2. Each version is recorded with a timestamp.
3. The version is marked as Published, indicating that it has been successfully saved.
Restoring a Saved Version
Steps
1. Open Version History from the Flow Editor sidebar.
2. Select the version to be restored from the version list.
3. If necessary, select Publish current draft to Manager to preserve the current draft before proceeding.
4. Click Restore.
Outcome
1. The selected version becomes the active draft on the canvas.
2. The restored version remains available within the Version History list.
3. The version retains its Published status.
Additional Information
1. Saving a version creates a restore point without interrupting the current workflow.
2. Restoring a version replaces the current draft in its entirety.
3. It is recommended to publish the current draft before restoring another version to prevent unintended data loss.
Edit Flow Details
You can update a flow’s description and manage its lock state from the Projects page.
Edit Flow Information
1. Navigate to the Projects page.
2. Locate the flow you want to update.
3. Click More, then select Edit Details.
4. Update the Description as needed.
5. (Optional) Enable the Lock option to restrict further edits to the flow.
6. Click Save to apply your changes.
Lock and Unlock a Flow
1. When a flow is locked, it cannot be modified.
2. To unlock a flow, open it in the editor. A Flow Locked dialog appears on the canvas. Click the dialog to unlock the flow.
The Lock Status indicates whether a flow is currently locked or unlocked. This status is for reference only while editing and cannot be changed directly from the Edit Details panel.
Flow storage and logs
By default, Robility Flow stores flows and logs locally:
Edit Flow Details
You can update a flow’s description and manage its lock state from the Projects page.
Edit Flow Information
1. Navigate to the Projects page.
2. Locate the flow you want to update.
3. Click More, then select Edit Details.
4. Update the Description as needed.
5. (Optional) Enable the Lock option to restrict further edits to the flow.
6. Click Save to apply your changes.
Lock and Unlock a Flow
1. When a flow is locked, it cannot be modified.
2. To unlock a flow, open it in the editor. A Flow Locked dialog appears on the canvas. Click the dialog to unlock the flow.
The Lock Status indicates whether a flow is currently locked or unlocked. This status is for reference only while editing and cannot be changed directly from the Edit Details panel.
Flow storage and logs
By default, Robility Flow stores flows and logs locally:E
| Platform | Path |
|---|---|
| macOS | /Users/<username>/.Robility flow/cache |
| Windows | C:\Users\<username>\AppData\Roaming\com.Robility flow\cache |
| OSS (uv install) | <venv_path>/lib/python3.12/site-packages/Robility flow/cache |
| OSS (git clone) | <repo_path>/src/backend/base/Robility flow/cache |
You can customize these locations:
- Flow Storage: Set ROBILITY_FLOW_CONFIG_DIR
- Log File Storage: Set ROBILITY_FLOW_LOG_FILE
