Test Flows
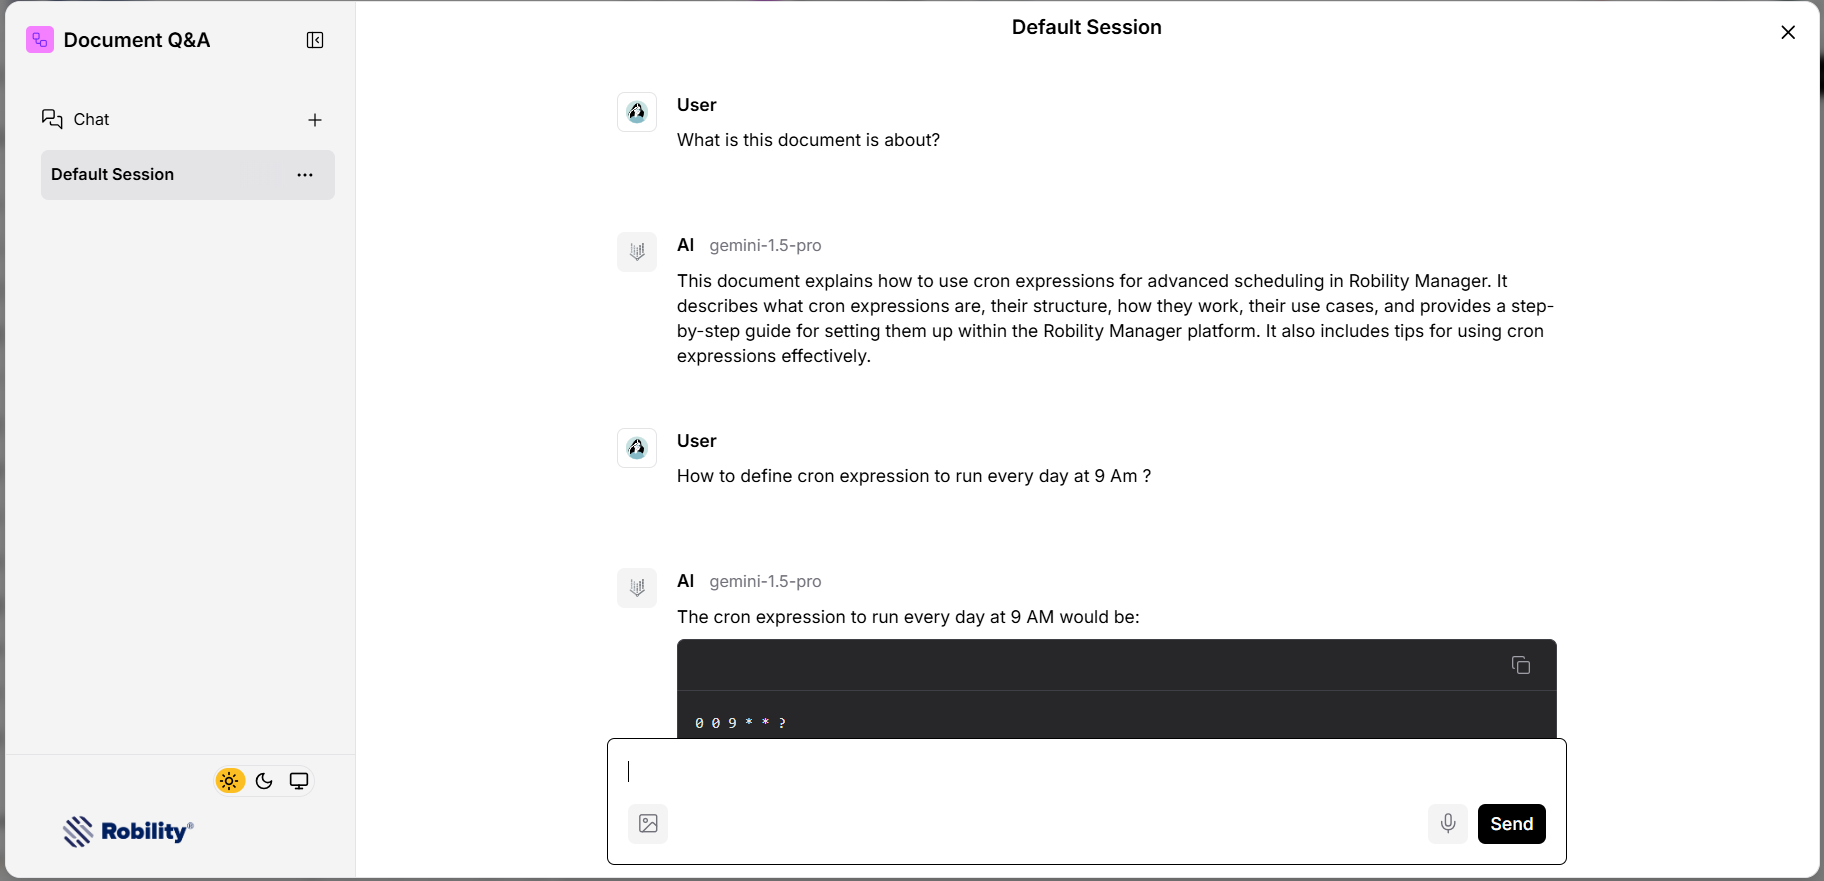
The Playground in Robility flow is an interactive space where you can test how your LLM-based flow behaves in real-time. It’s especially useful for experimenting with prompts, reviewing memory, checking output, and verifying how agentic flows use tools to respond to various inputs.
Whether you’re building a chatbot, digital assistant, or any tool that involves an LLM, the Playground helps you quickly prototype, debug, and improve your flow’s logic.
How to Run a Flow in the Playground
1. Open your flow.
2. Click Playground in the toolbar.
3. If your flow uses a Chat Input component, type your prompt or use voice mode to begin a chat session and trigger the flow.
Important Notes
1. If you don’t see a message input field, check that your flow includes a Chat Input connected (directly or indirectly) to a Language Model or Agent.
2. The Playground supports flows designed around LLMs with the following components:
a. Chat Input
b. Language Model / Agent
c. Chat Output
3. If your flow triggered differently (e.g., via webhook, file upload, or standard text input), you can use the Robility flow API to trigger the flow. You can then view the LLM processing in the Playground if the flow uses one.
Reviewing Agent Logic
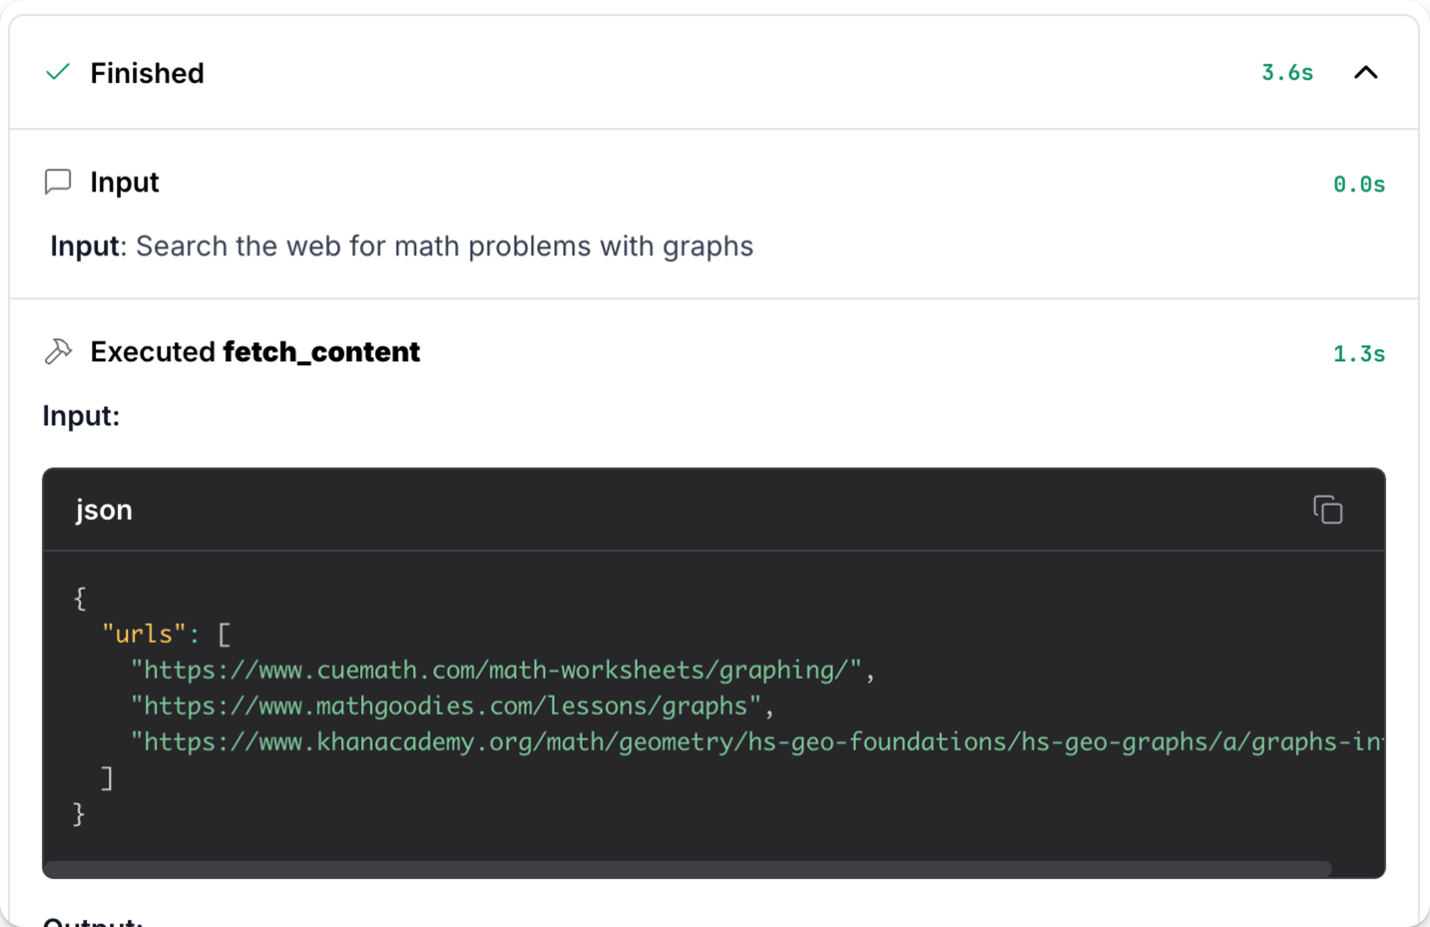
When your flow includes an Agent component, the Playground displays the tools used by the agent along with the output from each tool. This allows you to track how the agent operates and better understand the reasoning behind its responses.
For instance, if the agent uses a connected fetch content tool to perform a web search, the Playground will show that tool’s execution and its results, helping you visualize the agent’s decision-making process in real-time.
View Chat History
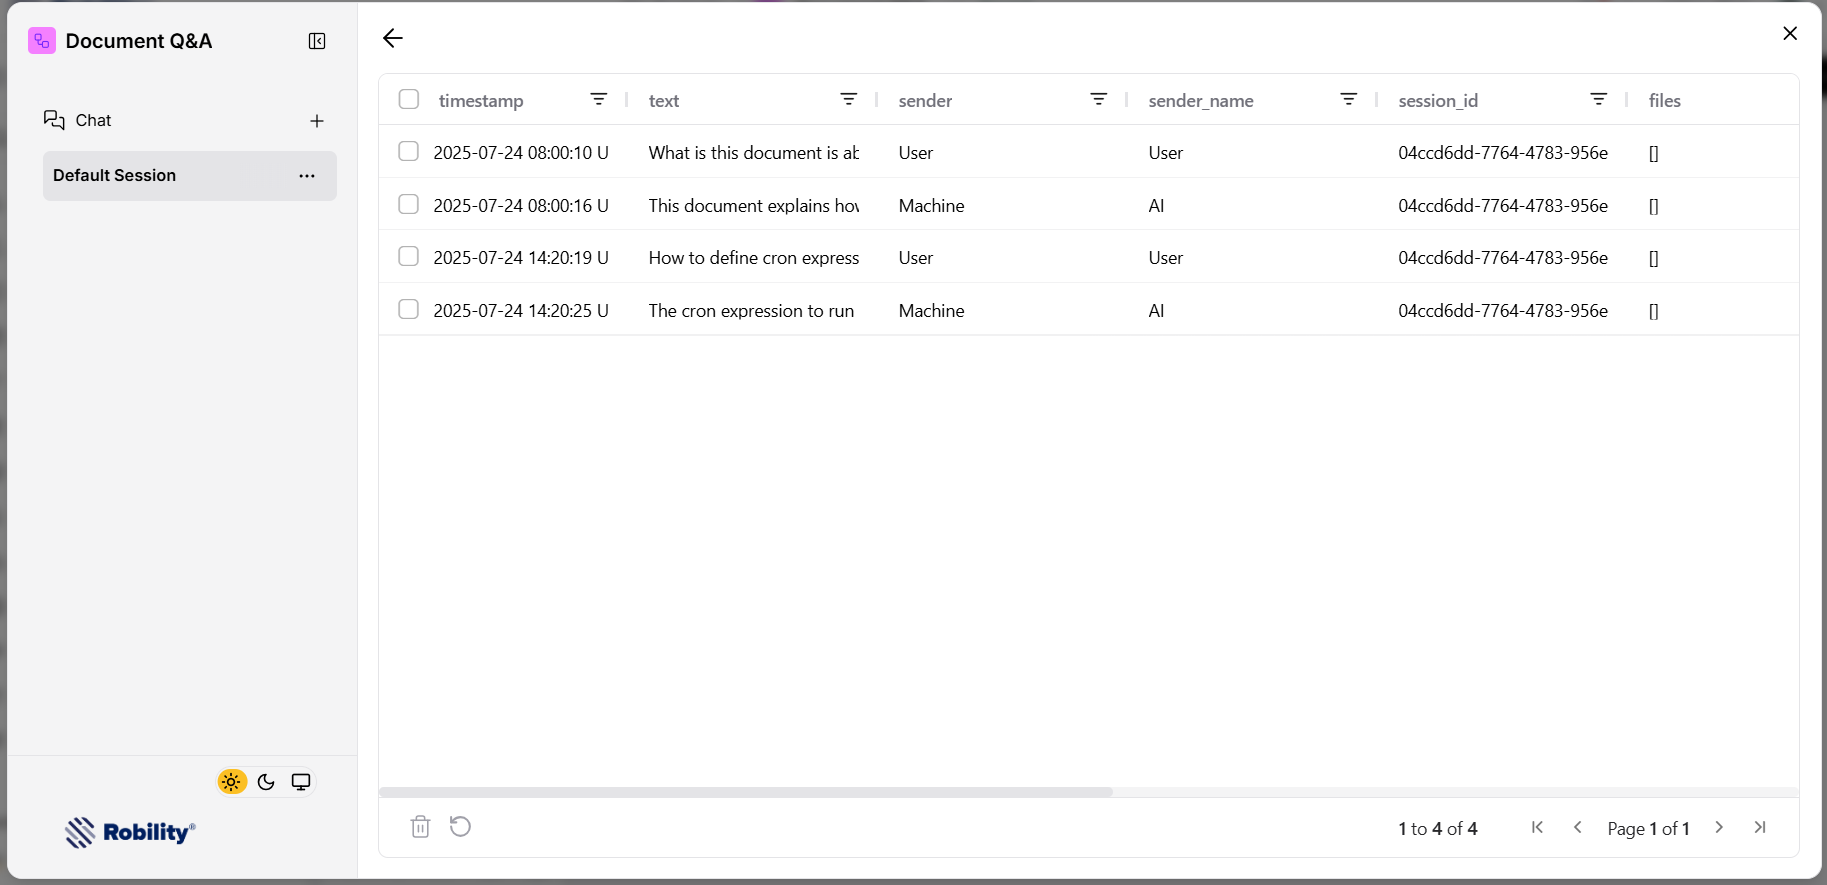
The Playground lets you review message logs from your flow’s chat sessions, showing details like timestamps, message content, and sender information.
To access the logs:
1. Go to the Playground sidebar.
2. Find the chat session you want to review.
3. Click Options and select Message Logs.
Modify memories in the Playground
To help debug and test your flows, you can edit or delete individual messages in message logs. For example, you might want to delete messages that you sent while testing a component that is no longer part of your flow.
You can also delete entire chat sessions from the sidebar: click Options, and then select Delete.
Modifying memories influences the behavior of the chatbot responses if you continue the chat session or if you preserve memories over multiple chat sessions.
Editing message logs edits Robility flow’s internal messages table, which is the default chat memory storage. For more information about managing sessions and chat memory in Robility flow, see Use custom session IDs and Memory management options.
View and Explore Message Logs
The Playground allows you to inspect the full chat history of any session, including timestamps, message content, and who sent each message.
To view message logs:
1. In the Playground sidebar, find the chat session.
2. Click Options → Message Logs.
3. Click any cell to view the full contents of that message.
Edit or Delete Messages and Sessions
You can directly modify messages in the Playground to help test and debug your flows.
1. Edit or delete individual messages in the message log to adjust memory or remove irrelevant test data.
2. Delete entire chat sessions from the sidebar:
a. Click Options → Delete.
Changing the message log edits Robility flow’s internal memory table, which may affect how the chatbot responds if you continue the session or reuse its memory across multiple sessions.
To learn more, see Memory Management Options and Using Custom Session IDs.
Custom Session IDs
By default, Robility flow uses the flow ID as the session ID, meaning all chats in a flow are grouped under one long conversation.
You can set a custom session_id to:
1. Separate sessions in multi-user or multi-instance scenarios.
2. Preserve chat context across multiple flow runs.
3. Debug more effectively by identifying individual sessions.
4. Avoid memory overlap between distinct interactions.
Ways to Set a Custom Session ID
1. In the Visual Editor:
a. Click the component (input/output) where you want to set the session ID.
b. Open the Controls menu in the header.
c. Enable Session ID and close the menu.
d. Enter your custom session ID.
2. Via the Robility flow API:
Pass session_id as a parameter when triggering flows.
Pro Tip: Use variables instead of hardcoded session IDs in production.
Examples:
a. Use a user ID to tie sessions to specific users.
b. Use a UUID to generate a unique session per interaction.
Share a Flow’s Playground
The Shareable Playground is for testing only. It’s not meant for embedding flows into production apps. For that, use the Robility flow API.
You can generate a public URL for a specific flow’s Playground, allowing others to test the flow without installing Robility flow or using an API key.
To Share a Playground:
1. Open the flow you want to share.
2. Click Share → Enable Shareable Playground.
3. Click Shareable Playground again to open it.
4. Copy the URL (e.g., https://your-server/playground/<FLOW_ID>).
5. Share the link with others so they can try your flow directly.
Users accessing the shared Playground can interact with the chat interface and see results—perfect for quick collaboration or demos.
Publishing to Manager
This option is available only for flows created within a Robility Manager–connected project. It allows you to publish the flow to Robility Manager, making it accessible for other users in the same project to view and use.
To publish the flow:
1. Open the flow you want to publish.
2. Click Share → Publish to Manager.
3. Provide the required details and click “Publish To Manager”.
