Use Robility flow as an MCP server
Robility flow integrates with the Model Context Protocol (MCP) as both an MCP server and an MCP client.
This page describes how to use Robility flow as an MCP server that exposes your flows as tools that MCP clients can use when generating responses.
Robility flow MCP servers support both the streamable HTTP transport and Server-Sent Events (SSE) as a fallback.
For information about using Robility flow as an MCP client, see Use Robility flow as an MCP client.
Prerequisites
1. A Robility flow project with at least one flow.
2. Any LTS version of Node.js installed on your computer if you want to use MCP Inspector to test and debug flows.
3. ngrok installed and an ngrok authtoken if you want to deploy a public Robility flow server.
Select and configure flows to expose as MCP tools
MCP flow requirements
A flow must contain a Chat Output component to be used as a tool by MCP clients.
Each Robility flow project has an MCP server that exposes the project’s flows as tools that MCP clients can use to generate responses.
By default, all flows in a project are exposed as tools on the project’s MCP server.
The following steps explain how to limit the exposed flows and, optionally, rename flows for agentic use:
1. From the Robility flow dashboard, select the project that contains the flows you want to serve as tools, and then click the MCP Server tab. Alternatively, you can quickly access the MCP Server tab from within any flow by selecting Share > MCP Server.
The Auto install and JSON tabs display options for connecting MCP clients to the project’s MCP server.
The Flows/Tools section lists the flows that are currently being served as tools.

2. Click Edit Tools.
3. In the MCP Server Tools window, select the flows that you want exposed as tools.
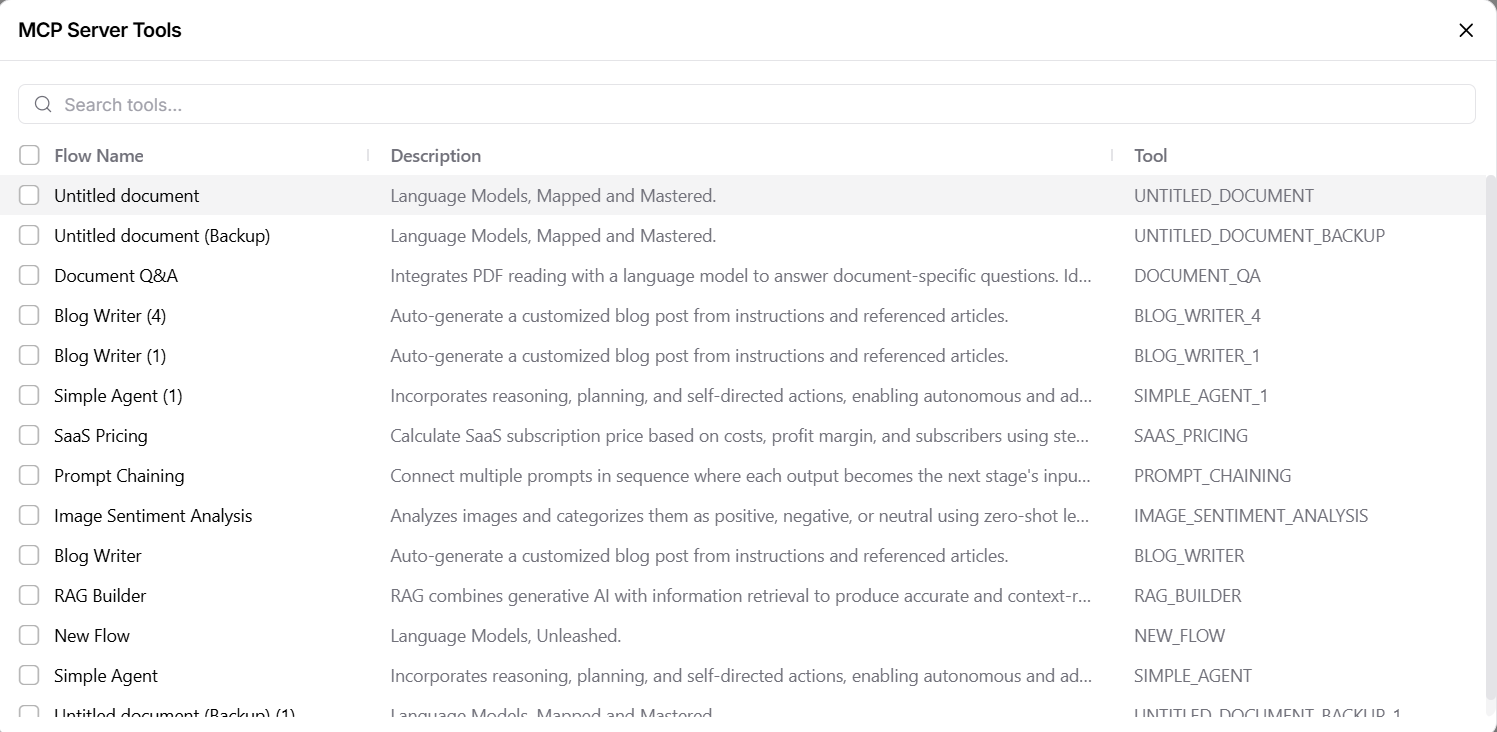
5. Recommended: Edit the Tool Name and Tool Description to help MCP clients determine which actions your flows provide and when to use those actions:
a. Tool Name: Enter a name that makes it clear what the flow does when used as a tool by an agent.
b. Tool Description: Enter a description that accurately describes the specific actions the flow performs.
Name and describe your flows for agentic use
6. Close the MCP Server Tools window to save your changes.
Connect clients to Robility flow’s MCP server
The following procedure describes how to connect Cursor to your Robility flow project’s MCP server to consume your flows as tools. However, you can connect any MCP-compatible client following similar steps.
a. Auto install
b. JSON
Important
Auto installation only works if your HTTP client and Robility flow server are on the same local machine. If this isn’t the case, use the JSON option to configure the MCP server.
1. Install Cursor.
2. In the Robility flow dashboard, select the project that contains the flows you want to serve, and then click the MCP Server tab.
3. To auto install your current Robility flow project as an MCP server, click Add.
The installation adds the server’s configuration file to Cursor’s mcp.json configuration file.
Cursor is now connected to your project’s MCP server and your flows are registered as tools. Cursor determines when to use tools based on your queries, and requests permissions when necessary. For more information, see the Cursor’s MCP documentation.
MCP server authentication and environment variables
You must provide a Robility flow API key in your MCP client configuration if your Robility flow server has authentication enabled.
When this is the case, the code template in your project’s MCP Server tab automatically includes the –header and x-api-key arguments:
{
  "mcpServers": {
    "PROJECT_NAME": {
      "command": "uvx",
      "args": [
        "mcp-proxy",
        "--headers",
        "x-api-key",
        "YOUR_API_KEY",
        "http://ROBILITYFLOW_SERVER_ADDRESS/api/v1/mcp/project/PROJECT_ID/sse"
      ]
    }
  }
}
Click Generate API key to automatically insert a new Robility flow API key into the code template. Alternatively, you can replace YOUR_API_KEY with an existing Robility flow API key.
To include other environment variables with your MCP server command, use the env object with key-value pairs of environment variables:
{
  "mcpServers": {
    "PROJECT_NAME": {
      "command": "uvx",
      "args": [
        "mcp-proxy",
        "http://ROBILITYFLOW_SERVER_ADDRESS/api/v1/mcp/project/PROJECT_ID/sse"
      ],
      "env": {
        "KEY": "VALUE"
      }
    }
  }
}
Deploy your MCP server externally
To deploy your MCP server externally with ngrok, see Deploy a public Robility flowserver.
Use MCP Inspector to test and debug flows
MCP Inspector is a common tool for testing and debugging MCP servers. You can use MCP Inspector to monitor your flows and get insights into how they are being consumed by the MCP server:
1. Install MCP Inspector: npx @modelcontextprotocol/inspector
For more information about configuring MCP Inspector, including specifying a proxy port, see the MCP Inspector GitHub project.
2. Open a web browser and navigate to the MCP Inspector UI. The default address is http://localhost:6274.
3. In the MCP Inspector UI, enter the connection details for your Robility flow project’s MCP server:
a. Transport Type: Select SSE.
b. URL: Enter Robility flowMCP server’s sse endpoint.
For example: http://localhost:7860/api/v1/mcp/project/d359cbd4-6fa2-4002-9d53-fa05c645319c/sse
If you’ve configured authentication for your MCP server, fill out the following additional fields:
a. Transport Type: Select STDIO.
b. Command: uvx
c. Arguments: Enter the following list of arguments, separated by spaces. Replace the values for YOUR_API_KEY, ROBILITYFLOW_SERVER_ADDRESS, and PROJECT_ID with the values from your Robility flow MCP server. For example: mcp-proxy –headers x-api-key YOUR_API_KEY http://ROBILITYFLOW_SERVER_ADDRESS/api/v1/mcp/project/PROJECT_ID/sse
4. Click Connect. If the connection was successful, you should see your project’s flows in the Tools tab. From this tab, you can monitor how your flows are being registered as tools by MCP, as well as test the tools with custom input values.
5. To quit MCP Inspector, press Control+C in the same terminal window where you started it.
Troubleshooting MCP server
If Claude for Desktop isn’t using your server’s tools correctly, you may need to explicitly define the path to your local uvx or npx executable file in the claude_desktop_config.json configuration file.
1. To find your UVX path, run which uvx.
To find your NPX path, run which npx.
2. Copy the path and then replace PATH_TO_UVX or PATH_TO_NPX in your claude_desktop_config.json file.
a. uvx
b. npx
{
  "mcpServers": {
    "PROJECT_NAME": {
      "command": "PATH_TO_UVX",
      "args": [
        "mcp-proxy",
        "http://ROBILITYFLOW_SERVER_ADDRESS/api/v1/mcp/project/PROJECT_ID/sse"
      ]
    }
  }
}
